The digital frontier is a warzone. Every line of code, every network packet, is a potential battlefield. To navigate this landscape, to understand the attacker's mind, you need a training ground. A secure, isolated environment where you can dissect systems, experiment with exploits, and hone your offensive skills without risking the integrity of production networks or your own digital life. This isn't about playing games; it's about mastery. This guide is your blueprint.
Forget the dimly lit rooms and the frantic typing of Hollywood. Building a practical, effective hacking lab is a deliberate process, a convergence of hardware, software, and a hacker's mindset. It's an investment in your expertise, a cornerstone for any serious cybersecurity professional, bug bounty hunter, or threat intelligence analyst. Whether you're aiming to become a certified penetration tester or simply wish to understand the deepest vulnerabilities in modern systems, your lab is where the real learning begins.
The Core Components: Hardware and Virtualization
At its heart, a hacking lab is about isolation and control. You need systems to attack and systems to attack *from*. The most efficient and cost-effective way to achieve this is through virtualization. This allows you to spin up multiple operating systems and network configurations on a single piece of hardware, saving space, power, and capital.
Choosing Your Host Machine: The Engine of Destruction
Your host machine is the powerhouse of your lab. It needs sufficient resources to run multiple virtual machines simultaneously without choking. Think of it as the foundation of your offensive arsenal.
- CPU: Aim for a multi-core processor (e.g., Intel Core i5/i7/i9 or AMD Ryzen 5/7/9) with a decent clock speed. More cores mean more simultaneous VMs and smoother performance.
- RAM: This is arguably the most critical component. For a decent lab, 16GB is the absolute minimum, but 32GB or even 64GB is highly recommended. Each virtual machine will consume RAM, and you don't want them fighting over crumbs.
- Storage: An SSD (Solid State Drive) is non-negotiable for your operating system and virtual machine disk images. The speed difference compared to an HDD is astronomical for boot times and I/O operations. Consider a larger SSD (500GB+) for your primary VM storage and potentially a secondary HDD for less critical data or snapshots.
- Network Interface: While most modern laptops and desktops have a gigabit Ethernet port, consider a machine with multiple network interfaces if you plan on advanced network segmentation and traffic manipulation.
Virtualization Software: Your Digital Playground Creator
This is the software that lets you create and manage your virtual machines. Several robust options are available, many of them free and open-source, fitting perfectly into the ethos of a cost-conscious hacker.
- VirtualBox: A popular, free, and open-source hypervisor from Oracle. It's user-friendly, cross-platform, and supports a wide range of guest operating systems. Excellent for beginners and intermediate users.
- VMware Workstation Player/Pro: VMware offers a free Player version for personal, non-commercial use, which is quite capable. Their Pro version is feature-rich but comes with a price tag. VMware is known for its performance and advanced features.
- KVM (Kernel-based Virtual Machine): Built directly into the Linux kernel, KVM offers high performance and efficiency. It's often used with management tools like
virt-managerfor a GUI experience. This is a top choice for Linux users prioritizing performance and open-source principles.
Recommendation: For most aspiring hackers, VirtualBox offers the best balance of ease of use, features, and cost (free). If you're already comfortable with Linux and seek maximum performance, KVM is the way to go.
Target Operating Systems: The Prey
Your lab needs systems to attack. These are your targets. For effective penetration testing and vulnerability research, you need a variety of operating systems and configurations.
Linux Distributions for Attackers
Linux is the de facto standard for security professionals. Its flexibility, powerful command-line tools, and open-source nature make it ideal.
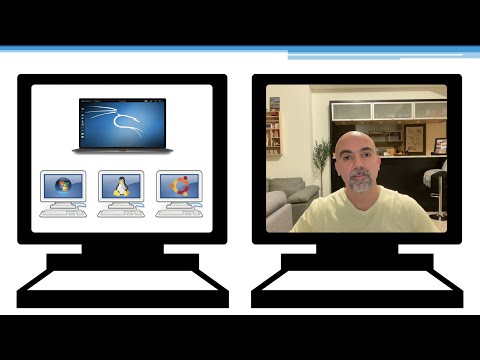
- Kali Linux: The most well-known penetration testing distribution. It comes pre-loaded with hundreds of security tools, from network scanners and vulnerability analyzers to exploit frameworks and password crackers. It's the Swiss Army knife for ethical hackers. Download from kali.org.
- Parrot Security OS: Another comprehensive security-focused distribution, offering a similar suite of tools to Kali but with a different user interface and additional anonymity tools.
- Ubuntu/Debian (for custom setups): While not security-focused out-of-the-box, these are excellent bases if you prefer to build your own custom attack environment, installing only the tools you need. This builds a deeper understanding of how the tools integrate.
Vulnerable Virtual Machines: Essential Practice
Simply attacking yourself isn't enough. You need systems *designed* to be vulnerable, allowing you to practice exploitation techniques in a safe, controlled manner. These are crucial for learning specific vulnerability classes.
- Metasploitable2/3: Developed by Rapid7, these intentionally vulnerable Linux VMs are perfect for practicing with the Metasploit Framework and other exploit techniques. Metasploitable2 is older but simpler; Metasploitable3 is more complex and challenging. Download from Rapid7's GitHub repository.
- OWASP Broken Web Applications Project: A collection of deliberately insecure web applications that expose common vulnerabilities like SQL Injection, Cross-Site Scripting (XSS), and more. Ideal for web application security testing. Available on OWASP's site.
- VulnHub Machines: VulnHub is a fantastic resource offering a vast repository of downloadable, community-created vulnerable virtual machines of varying difficulty levels. Each machine presents a unique challenge.
Network Configuration: The Battlefield Layout
How your virtual machines communicate is as critical as the machines themselves. Proper network segmentation is paramount for security and realism.
Internal Network (NAT Network or Host-Only Network)
Your primary lab network should be isolated from your host machine's main network and the internet to prevent accidental breaches.
- NAT Network: This mode allows your VMs to communicate with each other and access the internet (if you choose), but isolates them from your host's external network. It's like a private subnet behind a router.
- Host-Only Network: This creates a network that only includes your host machine and your VMs. VMs can communicate with each other and the host, but have no internet access. This offers the highest level of isolation.
Strategy: Start with a Host-Only network for maximum safety. Once you're comfortable and need to download updates or additional tools, you can switch to a NAT Network or configure a dedicated "Internet Gateway" VM (like pfSense or a hardened Kali VM) that sits between your lab network and your actual internet connection.
Dedicated Attack Machine
Your primary attack OS (e.g., Kali Linux) should reside on this isolated network. It will be used to launch attacks against your target VMs.
Target Machines
All your vulnerable VMs (Metasploitable, OWASP BWA, etc.) should be placed on the same isolated virtual network, allowing your Kali machine to scan and attack them.
Essential Tools: Your Operator's Toolkit
Beyond the operating systems, you'll need a suite of specialized tools. Many are already included in distributions like Kali, but you might want to explore others or install them on separate VMs.
Network Analysis and Reconnaissance
- Nmap: The de facto standard for network discovery and port scanning.
- Wireshark: A powerful network protocol analyzer for deep packet inspection. Essential for understanding traffic flow and identifying anomalies.
- Masscan: An extremely fast internet-wide port scanner. Use with extreme caution and only in your isolated lab environment.
Vulnerability Scanning
- Nessus: A comprehensive vulnerability scanner (commercial, but has a free version for limited use).
- OpenVAS: An open-source vulnerability scanner, a strong alternative to Nessus.
- Nikto: A web server scanner that checks for dangerous files, outdated versions, and other security issues.
Exploitation Frameworks
- Metasploit Framework: The most widely used platform for developing, testing, and executing exploits.
- Exploit-DB: A database of exploits and shellcode.
Web Application Testing
- Burp Suite: An indispensable tool for web application penetration testing. The free Community Edition is powerful; the Professional version is a game-changer for serious bug bounty hunters and pentesters. Invest in Burp Suite Pro if you're serious about web appsec.
- SQLMap: An automated SQL injection tool.
- DirBuster/Gobuster: Tools for brute-forcing directories and files on web servers.
Password Cracking
- John the Ripper: A classic password cracker.
- Hashcat: A highly efficient and versatile password recovery tool that leverages GPU acceleration.
Beyond the Basics: Advanced Lab Concepts
Once your foundational lab is up and running, you can start thinking about more advanced configurations to simulate real-world scenarios.
- Dedicated Active Directory Lab: For practicing Windows domain attacks (e.g., mimikatz, Kerberoasting), setting up a virtualized Active Directory domain controller is essential.
- Honeypots: Deploying tools like Cowrie (SSH honeypot) or Dionaea can help you study attacker techniques and collect threat intelligence within your lab.
- Traffic Mirroring and Analysis: Configure your virtual network to mirror traffic to a dedicated analysis VM running Wireshark or a SIEM like Security Onion.
- Mobile Hacking Lab: Consider emulators like Android Studio's emulator or specific mobile pentesting tools for on-device analysis.
Veredicto del Ingeniero: ¿Vale la pena la inversión?
Building a hacking lab is not an expense; it's an investment in your career. The time spent configuring your environment, experimenting with tools, and safely exploiting vulnerabilities is invaluable. It cultivates muscle memory, deepens understanding, and builds confidence. While free tools and distros get you started, acknowledge the power and efficiency of paid solutions like Burp Suite Pro or specialized hardware for certain tasks. Your lab is a living entity; continuously evolve it as you learn and as threats change.
Arsenal del Operador/Analista
- Hardware Host: Multi-core CPU, 32GB+ RAM, SSD Storage.
- Virtualization Software: VirtualBox (free, cross-platform), KVM (Linux, high-performance).
- Attack OS: Kali Linux (pre-loaded tools), Parrot Security OS.
- Vulnerable Targets: Metasploitable, OWASP BWA, VulnHub VMs.
- Network Tools: Nmap, Wireshark, Masscan.
- Web App Tools: Burp Suite Professional, SQLMap, Gobuster.
- Password Cracking: Hashcat, John the Ripper.
- Books: "The Hacker Playbook" series by Peter Kim, "The Web Application Hacker's Handbook" by Dafydd Stuttard and Marcus Pinto.
- Certifications (to aim for): OSCP (Offensive Security Certified Professional), eJPT (eLearnSecurity Junior Penetration Tester).
Preguntas Frecuentes
- Q: Is it legal to set up a hacking lab?
A: Absolutely. As long as you only attack systems you own or have explicit permission to test, it is perfectly legal and is the ethical standard for security professionals. - Q: How much RAM do I really need?
A: While 16GB is a bare minimum, 32GB will provide a much smoother experience, allowing you to run multiple VMs concurrently without performance degradation. 64GB is ideal for complex labs. - Q: Can I use my main computer for my hacking lab?
A: It's strongly advised against. Your lab should be isolated to prevent accidental damage or exposure to your primary operating system and network. - Q: What's the difference between NAT and Host-Only networking in VirtualBox?
A: Host-Only creates a private network between your host and guest VMs only. NAT Network allows VMs to communicate with each other and potentially the internet, but isolates them from your physical network.
El Contrato: Tu Primer Pentest Simulacro
Now, the real work begins. Your mandate is clear: set up your virtual environment. Install VirtualBox, download Kali Linux and Metasploitable2. Configure a Host-Only network between them. Once both VMs are running, from your Kali VM, use Nmap to scan Metasploitable. Identify open ports and services. Then, use a tool like searchsploit or Google to find a known vulnerability for one of the identified services. Attempt to craft an exploit to gain a shell on Metasploitable. Document every step, every command, every successful and failed attempt. This is your first real contract. Execute.
What services did you find on Metasploitable? What exploit did you use, and what were the challenges? Share your findings and code snippets in the comments. Let's see what you've built.
```Building Your Ultimate Hacking Lab: A Definitive Guide
The digital frontier is a warzone. Every line of code, every network packet, is a potential battlefield. To navigate this landscape, to understand the attacker's mind, you need a training ground. A secure, isolated environment where you can dissect systems, experiment with exploits, and hone your offensive skills without risking the integrity of production networks or your own digital life. This isn't about playing games; it's about mastery. This guide is your blueprint.
Forget the dimly lit rooms and the frantic typing of Hollywood. Building a practical, effective hacking lab is a deliberate process, a convergence of hardware, software, and a hacker's mindset. It's an investment in your expertise, a cornerstone for any serious cybersecurity professional, bug bounty hunter, or threat intelligence analyst. Whether you're aiming to become a certified penetration tester or simply wish to understand the deepest vulnerabilities in modern systems, your lab is where the real learning begins.
The Core Components: Hardware and Virtualization
At its heart, a hacking lab is about isolation and control. You need systems to attack and systems to attack *from*. The most efficient and cost-effective way to achieve this is through virtualization. This allows you to spin up multiple operating systems and network configurations on a single piece of hardware, saving space, power, and capital.
Choosing Your Host Machine: The Engine of Destruction
Your host machine is the powerhouse of your lab. It needs sufficient resources to run multiple virtual machines simultaneously without choking. Think of it as the foundation of your offensive arsenal.
- CPU: Aim for a multi-core processor (e.g., Intel Core i5/i7/i9 or AMD Ryzen 5/7/9) with a decent clock speed. More cores mean more simultaneous VMs and smoother performance.
- RAM: This is arguably the most critical component. For a decent lab, 16GB is the absolute minimum, but 32GB or even 64GB is highly recommended. Each virtual machine will consume RAM, and you don't want them fighting over crumbs.
- Storage: An SSD (Solid State Drive) is non-negotiable for your operating system and virtual machine disk images. The speed difference compared to an HDD is astronomical for boot times and I/O operations. Consider a larger SSD (500GB+) for your primary VM storage and potentially a secondary HDD for less critical data or snapshots.
- Network Interface: While most modern laptops and desktops have a gigabit Ethernet port, consider a machine with multiple network interfaces if you plan on advanced network segmentation and traffic manipulation.
Virtualization Software: Your Digital Playground Creator
This is the software that lets you create and manage your virtual machines. Several robust options are available, many of them free and open-source, fitting perfectly into the ethos of a cost-conscious hacker.
- VirtualBox: A popular, free, and open-source hypervisor from Oracle. It's user-friendly, cross-platform, and supports a wide range of guest operating systems. Excellent for beginners and intermediate users.
- VMware Workstation Player/Pro: VMware offers a free Player version for personal, non-commercial use, which is quite capable. Their Pro version is feature-rich but comes with a price tag. VMware is known for its performance and advanced features.
- KVM (Kernel-based Virtual Machine): Built directly into the Linux kernel, KVM offers high performance and efficiency. It's often used with management tools like
virt-managerfor a GUI experience. This is a top choice for Linux users prioritizing performance and open-source principles.
Recommendation: For most aspiring hackers, VirtualBox offers the best balance of ease of use, features, and cost (free). If you're already comfortable with Linux and seek maximum performance, KVM is the way to go.
Target Operating Systems: The Prey
Your lab needs systems to attack. These are your targets. For effective penetration testing and vulnerability research, you need a variety of operating systems and configurations.
Linux Distributions for Attackers
Linux is the de facto standard for security professionals. Its flexibility, powerful command-line tools, and open-source nature make it ideal.
- Kali Linux: The most well-known penetration testing distribution. It comes pre-loaded with hundreds of security tools, from network scanners and vulnerability analyzers to exploit frameworks and password crackers. It's the Swiss Army knife for ethical hackers. Download from kali.org.
- Parrot Security OS: Another comprehensive security-focused distribution, offering a similar suite of tools to Kali but with a different user interface and additional anonymity tools.
- Ubuntu/Debian (for custom setups): While not security-focused out-of-the-box, these are excellent bases if you prefer to build your own custom attack environment, installing only the tools you need. This builds a deeper understanding of how the tools integrate.
Vulnerable Virtual Machines: Essential Practice
Simply attacking yourself isn't enough. You need systems *designed* to be vulnerable, allowing you to practice exploitation techniques in a safe, controlled manner. These are crucial for learning specific vulnerability classes.
- Metasploitable2/3: Developed by Rapid7, these intentionally vulnerable Linux VMs are perfect for practicing with the Metasploit Framework and other exploit techniques. Metasploitable2 is older but simpler; Metasploitable3 is more complex and challenging. Download from Rapid7's GitHub repository.
- OWASP Broken Web Applications Project: A collection of deliberately insecure web applications that expose common vulnerabilities like SQL Injection, Cross-Site Scripting (XSS), and more. Ideal for web application security testing. Available on OWASP's site.
- VulnHub Machines: VulnHub is a fantastic resource offering a vast repository of downloadable, community-created vulnerable virtual machines of varying difficulty levels. Each machine presents a unique challenge.
Network Configuration: The Battlefield Layout
How your virtual machines communicate is as critical as the machines themselves. Proper network segmentation is paramount for security and realism.
Internal Network (NAT Network or Host-Only Network)
Your primary lab network should be isolated from your host machine's main network and the internet to prevent accidental breaches.
- NAT Network: This mode allows your VMs to communicate with each other and access the internet (if you choose), but isolates them from your host's external network. It's like a private subnet behind a router.
- Host-Only Network: This creates a network that only includes your host machine and your VMs. VMs can communicate with each other and the host, but have no internet access. This offers the highest level of isolation.
Strategy: Start with a Host-Only network for maximum safety. Once you're comfortable and need to download updates or additional tools, you can switch to a NAT Network or configure a dedicated "Internet Gateway" VM (like pfSense or a hardened Kali VM) that sits between your lab network and your actual internet connection.
Dedicated Attack Machine
Your primary attack OS (e.g., Kali Linux) should reside on this isolated network. It will be used to launch attacks against your target VMs.
Target Machines
All your vulnerable VMs (Metasploitable, OWASP BWA, etc.) should be placed on the same isolated virtual network, allowing your Kali machine to scan and attack them.
Essential Tools: Your Operator's Toolkit
Beyond the operating systems, you'll need a suite of specialized tools. Many are already included in distributions like Kali, but you might want to explore others or install them on separate VMs.
Network Analysis and Reconnaissance
- Nmap: The de facto standard for network discovery and port scanning.
- Wireshark: A powerful network protocol analyzer for deep packet inspection. Essential for understanding traffic flow and identifying anomalies.
- Masscan: An extremely fast internet-wide port scanner. Use with extreme caution and only in your isolated lab environment.
Vulnerability Scanning
- Nessus: A comprehensive vulnerability scanner (commercial, but has a free version for limited use).
- OpenVAS: An open-source vulnerability scanner, a strong alternative to Nessus.
- Nikto: A web server scanner that checks for dangerous files, outdated versions, and other security issues.
Exploitation Frameworks
- Metasploit Framework: The most widely used platform for developing, testing, and executing exploits.
- Exploit-DB: A database of exploits and shellcode.
Web Application Testing
- Burp Suite: An indispensable tool for web application penetration testing. The free Community Edition is powerful; the Professional version is a game-changer for serious bug bounty hunters and pentesters. Invest in Burp Suite Pro if you're serious about web appsec.
- SQLMap: An automated SQL injection tool.
- DirBuster/Gobuster: Tools for brute-forcing directories and files on web servers.
Password Cracking
- John the Ripper: A classic password cracker.
- Hashcat: A highly efficient and versatile password recovery tool that leverages GPU acceleration.
Beyond the Basics: Advanced Lab Concepts
Once your foundational lab is up and running, you can start thinking about more advanced configurations to simulate real-world scenarios.
- Dedicated Active Directory Lab: For practicing Windows domain attacks (e.g., mimikatz, Kerberoasting), setting up a virtualized Active Directory domain controller is essential.
- Honeypots: Deploying tools like Cowrie (SSH honeypot) or Dionaea can help you study attacker techniques and collect threat intelligence within your lab.
- Traffic Mirroring and Analysis: Configure your virtual network to mirror traffic to a dedicated analysis VM running Wireshark or a SIEM like Security Onion.
- Mobile Hacking Lab: Consider emulators like Android Studio's emulator or specific mobile pentesting tools for on-device analysis.
Veredicto del Ingeniero: ¿Vale la pena la inversión?
Building a hacking lab is not an expense; it's an investment in your career. The time spent configuring your environment, experimenting with tools, and safely exploiting vulnerabilities is invaluable. It cultivates muscle memory, deepens understanding, and builds confidence. While free tools and distros get you started, acknowledge the power and efficiency of paid solutions like Burp Suite Pro or specialized hardware for certain tasks. Your lab is a living entity; continuously evolve it as you learn and as threats change.
Arsenal del Operador/Analista
- Hardware Host: Multi-core CPU, 32GB+ RAM, SSD Storage.
- Virtualization Software: VirtualBox (free, cross-platform), KVM (Linux, high-performance).
- Attack OS: Kali Linux (pre-loaded tools), Parrot Security OS.
- Vulnerable Targets: Metasploitable, OWASP BWA, VulnHub VMs.
- Network Tools: Nmap, Wireshark, Masscan.
- Web App Tools: Burp Suite Professional, SQLMap, Gobuster.
- Password Cracking: Hashcat, John the Ripper.
- Books: "The Hacker Playbook" series by Peter Kim, "The Web Application Hacker's Handbook" by Dafydd Stuttard and Marcus Pinto.
- Certifications (to aim for): OSCP (Offensive Security Certified Professional), eJPT (eLearnSecurity Junior Penetration Tester).
Preguntas Frecuentes
- Q: Is it legal to set up a hacking lab?
A: Absolutely. As long as you only attack systems you own or have explicit permission to test, it is perfectly legal and is the ethical standard for security professionals. - Q: How much RAM do I really need?
A: While 16GB is a bare minimum, 32GB will provide a much smoother experience, allowing you to run multiple VMs concurrently without performance degradation. 64GB is ideal for complex labs. - Q: Can I use my main computer for my hacking lab?
A: It's strongly advised against. Your lab should be isolated to prevent accidental damage or exposure to your primary operating system and network. - Q: What's the difference between NAT and Host-Only networking in VirtualBox?
A: Host-Only creates a private network between your host and guest VMs only. NAT Network allows VMs to communicate with each other and potentially the internet, but isolates them from your physical network.
El Contrato: Tu Primer Pentest Simulacro
Now, the real work begins. Your mandate is clear: set up your virtual environment. Install VirtualBox, download Kali Linux and Metasploitable2. Configure a Host-Only network between them. Once both VMs are running, from your Kali VM, use Nmap to scan Metasploitable. Identify open ports and services. Then, use a tool like searchsploit or Google to find a known vulnerability for one of the identified services. Attempt to craft an exploit to gain a shell on Metasploitable. Document every step, every command, every successful and failed attempt. This is your first real contract. Execute.
What services did you find on Metasploitable? What exploit did you use, and what were the challenges? Share your findings and code snippets in the comments. Let's see what you've built.