Showing posts with label proot. Show all posts

Mastering Kali Linux on Android: A Defensive Deep Dive into ARM Exploitation & Mobile Security

Visualizing the Kali Linux environment on an Android device, a gateway to mobile security analysis.

The hum of a compromised network is a siren song to some. To us, it's a data stream, a puzzle inscribed in logs and packets. Today, we're not dissecting the usual server farm; we're descending into the palm of your hand. The modern attacker knows the battleground has expanded beyond the desktop. Mobile devices, once mere communication tools, are now potent platforms for both attack and defense. Deploying a full-fledged security distribution like Kali Linux onto an Android device, especially without the need for root privileges, shifts the paradigm for mobile security professionals and ethical hackers. This isn't about making your phone a weapon; it's about transforming it into a mobile security lab, a crucial tool for analysis and understanding the threats lurking in the mobile ecosystem.

Understanding how to provision Kali Linux on Android, particularly for architectures like ARM, is vital for anyone involved in penetration testing, threat hunting, or mobile application security. It allows for deep dives into network traffic, reverse engineering mobile applications, and even understanding exploit vectors targeting mobile operating systems. The absence of root access simplifies deployment for many users and bypasses common security restrictions, opening up new avenues for analysis right from your pocket. This guide will illuminate the process from a defensive perspective, showing you how to leverage this capability to build a more robust mobile security posture.

Table of Contents

Understanding ARM Architecture and Linux Containers

The vast majority of mobile devices today run on ARM processors. Unlike x86 architectures that dominate desktop and server environments, ARM is designed for power efficiency, making it ideal for battery-powered devices. This fundamental difference impacts how software is compiled and executed. When we talk about running Kali Linux on Android, we're typically not performing a bare-metal installation. Instead, we are utilizing containerization or chroot environments that simulate a Linux system within Android's existing Linux kernel. Technologies like proot (a user-space implementation of chroot, mount --bind, and C library interactions) are instrumental here. They allow us to run a Kali Linux user-space on top of the Android system without requiring kernel modifications or root access. This means we can execute standard Linux binaries and tools, albeit compiled for the ARM architecture, within a sandboxed environment.

The key here is recognizing that the Android kernel itself is Linux. Therefore, with the right tools, we can overlay a different Linux distribution's user-space. Understanding this layering is critical for defensive analysis. It means that while you have Kali tools at your disposal, the underlying Android security model, SELinux policies, and kernel protections are still in play. Exploiting this setup defensively means comprehending the interaction between these layers. For instance, understanding how `proot` manipulates file paths and permissions is crucial for analyzing potential privilege escalation vectors or containment bypasses.

The No-Root Approach: Leveraging proot

The allure of running Kali Linux on Android without root is significant. Root access fundamentally alters the device's security posture, making it more vulnerable to malicious software and compromising data integrity. The proot utility is the linchpin of this no-root strategy. It intercepts system calls and redirects them, creating an illusion of a different root directory for the processes running within the simulated environment. This is akin to setting up a virtualized environment, but with a much lighter footprint.

Tools like Termux have popularized this approach. Termux provides a minimal Linux environment and package manager on Android, and through its extensions and community packages, users can install `proot` and then bootstrap a Kali Linux user-space. The process involves downloading a pre-compiled Kali rootfs (root file system) for ARM, extracting it, and then using `proot` to mount and execute binaries from this extracted environment. From a defensive standpoint, this is fascinating. You're essentially running a separate, isolated Linux distribution with its own set of tools and libraries, all mediated by `proot` and the Android system. This isolation, while not as robust as full virtualization or containerization (like Docker on other platforms), provides a valuable layer for security research. It allows you to experiment with network tools, scripting languages, and security frameworks without impacting the core Android system.

"The best defense is a deep understanding of the attack. By simulating offensive environments in controlled settings, we build impenetrable walls." - cha0smagick

When setting this up, consider the implications. While `proot` offers isolation, it's not a foolproof security boundary. A sophisticated exploit within the Kali environment could potentially breach the `proot` layer and interact with the underlying Android system. Therefore, vigilance is paramount.

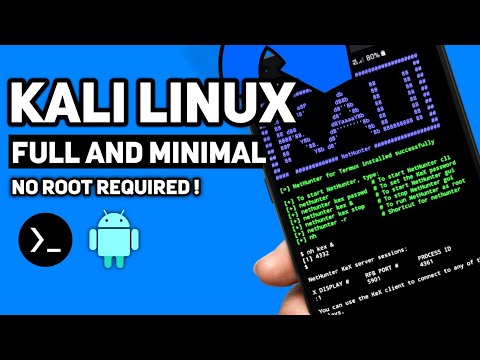
Setting Up Your Mobile Security Lab: Kali NetRunner on Android

While various methods exist, one common and effective way to deploy a comprehensive Kali environment non-root is through applications like Termux, often combined with scripts that automate the bootstrapping process. For instance, community-developed scripts leverage `proot` to download and set up a Kali Linux rootfs (which includes a desktop environment like XFCE, making it feel like a full Kali installation) within Termux. This allows you to run graphical applications and a full suite of security tools directly on your Android device.

The typical workflow involves:

  1. Installing Termux from F-Droid (for the latest versions with better support).
  2. Updating Termux packages: pkg update && pkg upgrade -y
  3. Installing necessary utilities: pkg install git proot wget -y
  4. Cloning a popular Kali bootstrapping script repository (e.g., from GitHub, search for "kali linux on termux no root").
  5. Running the script to download the Kali rootfs and set up the environment. This can take a significant amount of time and storage space.
  6. Starting the Kali session using `proot`. This often involves commands like ./start-kali.sh or similar, depending on the script used.
  7. Once the session is active, you can launch graphical applications via VNC or an X server client within Termux.

This process transforms your device into a portable penetration testing and security analysis workstation. From a defensive perspective, this setup is invaluable for simulating attacks against mobile services or networks you are responsible for protecting. It allows you to test your own infrastructure from a mobile platform, identifying weaknesses that might only be apparent when approached from a different vector.

Defensive Strategies: Monitoring and Analysis

Having Kali Linux on your Android device isn't just about offensive capabilities; it's a powerful tool for defense. The ability to run tools like Wireshark (or its command-line counterpart, TShark), Nmap, tcpdump, dnscat2, or even simple shell scripting directly on your phone allows for on-the-go network monitoring and analysis. Imagine being able to capture traffic from a public Wi-Fi network you're connected to, analyze it for suspicious patterns, or scan your local network for rogue devices – all from your phone.

Key Defensive Use Cases:

  • Network Traffic Analysis: Use tcpdump or TShark to capture and analyze network packets in real-time. This is invaluable for identifying unauthorized communication, data exfiltration attempts, or reconnaissance activities.
  • Vulnerability Scanning: Employ Nmap to scan your local network or specific segments for open ports, running services, and potential vulnerabilities. This helps in identifying exposed assets that need patching or hardening.
  • Log Analysis: While full-fledged log management is difficult on mobile, you can use tools like grep, awk, and sed to quickly sift through log files for anomalous entries when investigating an incident remotely.
  • Incident Response Preparation: Have a controlled environment ready to analyze suspicious files or network connections encountered on the go.

The crucial defensive aspect is understanding the output of these tools. Learning to differentiate normal network behavior from malicious activity, recognizing patterns indicative of scanning or exploitation, and knowing how to interpret packet captures are skills honed through practice. Your mobile Kali environment becomes a sandbox for learning and applying these defensive techniques.

Vulnerability Research on Mobile Platforms

The mobile landscape presents unique security challenges. Applications often run with broad permissions, interact with sensitive hardware (camera, microphone, GPS), and communicate over potentially untrusted networks. Running Kali on Android provides a platform to delve into this. You can set up an environment to:

  • Analyze Mobile Application Binaries: Use tools like radare2, Ghidra (if you can get it running), or objdump to reverse engineer Android applications (APKs, which are essentially ZIP archives containing Dalvik bytecode). Understanding how applications process data, handle authentication, and store sensitive information is key to finding vulnerabilities like insecure data storage or logic flaws.
  • Intercept and Modify Mobile Traffic: Set up tools like mitmproxy or Burp Suite (if feasible on ARM) to act as a Man-in-the-Middle proxy for traffic originating from other apps on your device (or other devices on your network, acting as a mobile gateway). This allows you to inspect, modify, and replay HTTP/S requests, uncovering vulnerabilities in how applications communicate with their backend servers.
  • Test Network Services: If you're developing or managing mobile backend services, you can use your mobile Kali setup to test their security from a mobile perspective, simulating real-world attack vectors.

This type of research is inherently dual-use. The knowledge gained from understanding how to probe mobile applications and their networks can be used to build better defenses, implement stronger security controls, and develop more resilient applications. It’s about knowing the enemy’s playbook to fortify your own position.

Arsenal of the Mobile Operator/Analyst

To effectively leverage Kali Linux on Android, a curated set of tools and knowledge is essential. Beyond the standard Kali repositories, consider these:

  • Termux:API: Grants access to device hardware and features (camera, GPS, sensors) from within Termux, invaluable for mobile-specific security testing.
  • VNC Viewer / XServer XSDL: For accessing graphical desktop environments (like XFCE) running under `proot`.
  • NetGuard / Firewall Apps: To control network access for individual applications, including Termux, enhancing isolation.
  • Mobile VPN Clients: For secure tunneling of your traffic, especially when analyzing potentially sensitive data.
  • Books: "The Web Application Hacker's Handbook" (for understanding web-based vulnerabilities relevant to mobile app backends), "Practical Mobile Forensics" (for understanding mobile data structures), and any good Python or ARM assembly language guides.
  • Certifications: While not directly applicable to mobile Kali, certifications like the CompTIA Security+, OSCP (Offensive Security Certified Professional), or GIAC Mobile Device Security Analyst (GMOB) provide foundational knowledge critical for this work.

Investing in these tools and expanding your knowledge base directly translates to a more capable and efficient defense strategy. The effectiveness of your mobile security operations hinges on the quality of your tools and your expertise in using them.

FAQ: Mobile Kali Linux

Can I really install full Kali Linux on Android without root?

Yes, using tools like Termux and `proot`, you can run a Kali Linux user-space environment, including graphical desktops and most standard tools, without needing root access. It's a simulated environment, not a native installation.

Is it safe to use Kali Linux on my primary Android device?

While the no-root method offers isolation, it's generally not recommended to run security tools on your primary device, especially if it contains sensitive personal data. A compromised environment or a misconfiguration could still pose risks. Using a dedicated secondary device is a safer approach.

What are the performance limitations of running Kali on Android?

Performance depends heavily on your device's hardware (CPU, RAM, storage speed) and what you're trying to run. Graphical environments and resource-intensive tools like Wireshark or reverse engineering frameworks can strain older or lower-spec devices. ARM architecture can also have compatibility nuances for certain x86-compiled tools.

How do I update Kali Linux when running it on Android via Termux?

You'll typically update Kali packages using its own package manager (apt update && apt upgrade) within the Kali session established by `proot`. Termux packages should also be updated separately via pkg update && pkg upgrade.

The Contract: Securing Your Mobile Perimeter

The power to wield Kali Linux from your pocket is a double-edged sword. It grants unparalleled insight into mobile security threats, but also demands a profound sense of responsibility. Your mobile device, now a portable security analysis station, must itself be secured. This means rigorously applying the very principles you explore: strong passwords, device encryption, disabling unnecessary services, and being hyper-aware of the apps you install and the networks you connect to.

Consider this your final briefing: What is the single most critical security configuration you will implement on your Android device *before* you even consider installing Termux or any security tools? Document this step and the reasoning behind it. Share your thoughts below. The strength of your perimeter is measured by your discipline.

Mastering Termux: Achieving Root Access on Android Without Rooting Your Device

Introduction: The Ghost in the Machine

The glow of the terminal is your only companion in the dead of night, the lines of code a familiar script. You're deep in the belly of an Android device, probing its secrets. But the deeper you go, the more you hit a wall – a permissions wall. Standard Termux, while powerful, operates within the confines of a normal user. To truly dance with the system, to orchestrate complex security operations, you need more. You need root. But the spectre of voiding warranties and bricking devices looms large. What if there was a way to coax root-like privileges, to unlock the power of the command line without ever touching the system's core? Today, we're not patching a system; we're performing a digital autopsy on privilege escalation within Termux.

Android, at its heart, is a Linux distribution. This fundamental truth is what makes Termux such a potent tool for security professionals and enthusiasts alike. It provides a near-native Linux environment, complete with package management and a vast array of command-line utilities. However, the Android security model is designed to sandbox applications, restricting direct access to system resources and functionalities that typically require root privileges. This means that while you can install security tools like Nmap, Aircrack-ng, or Metasploit, their efficacy is often severely crippled without elevated permissions. The question then becomes: how do we bridge this gap and achieve a semblance of root access within Termux, thereby expanding our operational capabilities on a non-rooted device? The answer lies not in altering the device's fundamental state, but in cleverly emulating it.

Understanding Termux and Proot: The Core Components

Termux is more than just a terminal emulator; it's a complete Linux environment that runs as a standard Android application. It leverages Android's underlying Linux kernel without requiring root access. This isolation is a double-edged sword: it enhances security by preventing apps from interfering with each other or the system, but it limits the depth of actions an application can perform. For security analysts, this limitation is often the first hurdle encountered when attempting to perform tasks like packet sniffing, accessing certain system files, or running network scanners with raw socket capabilities.

This is where proot enters the fray. proot is a user-space implementation of chroot, mount --bind, and binfmt_misc. Crucially, it allows you to run programs with an altered root directory and simulate root privileges without actually needing root access on the host system. It works by intercepting system calls and redirecting them, creating an isolated environment that *behaves* like a root-owned system. Think of it as a sophisticated illusionist, making the terminal believe it's the king of the castle, even when it's just a privileged guest. This is a critical distinction: proot does not grant true root access to the Android OS itself; it simulates it within the Termux environment.

The synergy between Termux and proot is elegant. Termux provides the Linux-like shell and package manager, and proot injects the illusion of root privileges necessary for many advanced tools and operations. This technique is often referred to as "fake root." It's a workaround, a clever sidestep around the stringent security measures imposed by Android. For bug bounty hunters targeting mobile applications, or network security professionals needing to test local network devices from their phones, this capability is invaluable.

The Technical Walkthrough: Emulating Root

To begin this operation, ensure you have Termux installed from a reputable source (F-Droid is recommended for up-to-date versions). Open Termux, and let your terminal greet you. The first step is to update your package lists and install the necessary tool. This is where the illusion begins.

  1. Update Packages:

    Always start by ensuring your package repositories are up-to-date. This guarantees you're fetching the latest versions and security patches.

    pkg update && pkg upgrade -y
  2. Install proot:

    This is the key component that will allow us to simulate root privileges. The `-y` flag automatically confirms any prompts during installation.

    pkg install proot -y
  3. Initialize the proot Environment:

    Now, we use proot to create a new environment. The flags are crucial:

    • -0: This flag tells proot to run the command as root (user ID 0).
    • -w ~: This sets the working directory to your home directory within the proot environment.
    • $PREFIX/bin/bash: This specifies the shell to run within the proot environment. $PREFIX is an environment variable in Termux that points to the installation directory of packages.

    Execute the following command to enter the simulated root shell:

    proot -0 -w ~ $PREFIX/bin/bash

Upon successful execution, your terminal prompt should change, often displaying something like root@localhost:~#. This visual cue signifies that you are now operating within the simulated root environment provided by proot. Any commands executed from this point forward will be interpreted as if they were run by the root user within this isolated context.

Let's test this. Try running a command that typically requires root privileges, such as trying to list all running processes, including those owned by root.

ps aux

In a non-root Termux session, you might see limitations. Here, within the proot environment, you should be able to list a much broader set of processes, including system-level ones that would normally be hidden. This demonstrates the effectiveness of proot in simulating elevated permissions.

Furthermore, certain tools that are notoriously picky about requiring root access, such as advanced network scanning utilities or tools that interact directly with network interfaces, might now function correctly. For instance, attempting to run Nmap with the -sT (TCP Connect Scan) or -sS (SYN Scan) flags, which can sometimes require raw socket privileges, might yield better results within this simulated root environment.

Hardening Your Emulated Environment

While proot provides a powerful illusion, it's essential to remember its limitations and to proceed with caution. This is not true root access. You cannot modify critical system files outside of the Termux environment, nor can you directly interact with hardware interfaces in the way a genuinely rooted device would allow (e.g., advanced Wi-Fi packet injection).

For security-conscious users, consider further isolating your Termux installation. Ensure Termux has only the necessary permissions granted through Android's app settings. Avoid granting it storage access if not strictly required for your operations. When installing additional packages within the proot environment, especially those compiled from source or from less reputable repositories, always exercise due diligence. The principle of least privilege, even in a simulated environment, is paramount.

"The network is a jungle. Assume every connection is a potential threat, and every tool is a potential weapon. Use them wisely."

A common pitfall is to assume proot grants capabilities it does not. For tasks requiring true hardware access or system-level modifications on Android, rooting the device remains the only path. However, for many penetration testing scenarios, bug bounty hunting, or advanced command-line work on an Android device, proot within Termux offers a robust and accessible alternative.

Practical Applications and Limitations

The utility of achieving "root" in Termux without rooting the device spans several domains:

  • Bug Bounty Hunting: Test web applications hosted on your device or local network with tools that might expect elevated privileges. Analyze app behavior without needing to compromise your primary device's security.
  • Network Analysis: Run network scanners and diagnostic tools with greater capability, allowing for more comprehensive local network assessments.
  • Software Development & Testing: Set up complex development environments, compile software, and test scripts that rely on Linux-specific functionalities.
  • Learning & Experimentation: Explore Linux command-line utilities and security concepts in a safe, isolated environment.

However, the limitations are significant and must be understood:

  • No True System Access: You cannot modify the Android OS core files, change system properties, or gain control over hardware features that require deep system integration.
  • Performance Overhead: proot introduces an emulation layer, which can lead to a performance degradation compared to native execution or a truly rooted system.
  • Tool Compatibility: While many tools will work, some highly specialized tools that require direct kernel-level interaction or specific hardware drivers may still fail.
  • Security Theater: It's crucial to remember that this is a simulated environment. It doesn't offer the same level of security isolation or control as a properly rooted system with robust security configurations.

Engineer's Verdict: A Necessary Illusion?

Proot within Termux is a clever, practical solution for users who need elevated command-line capabilities on Android but wish to avoid the risks and complexities associated with rooting their device. It successfully bridges the gap for many common security tasks, offering a "good enough" experience for analysts and enthusiasts. It democratizes access to powerful Linux tools on mobile platforms.

Pros:

  • Achieves simulated root access without compromising device warranty or security posture.
  • Expands the functionality of Termux significantly for security-related tasks.
  • Easy to set up and use.
  • Excellent for learning and experimentation.

Cons:

  • Not true root access; limitations in hardware and system interaction persist.
  • Performance overhead due to emulation.
  • Can be mistaken for true root, leading to incorrect assumptions about capabilities.

Recommendation: For users who understand its limitations and primarily need enhanced command-line functionality for tasks like running specific Linux utilities or security scripts without deep system modification, proot is an excellent tool. If your objective is to engage in advanced tasks like kernel module development, deep packet inspection with custom drivers, or flashing custom ROMs, you will still need to root your device.

Operator's Arsenal

To enhance your operations within Termux, consider these essential tools:

  • Termux: The foundational environment itself. Ideally sourced from F-Droid for the latest updates.
  • Proot: The key to unlocking simulated root privileges.
  • Metasploit Framework: Powerful exploitation and post-exploitation framework. Installing and running certain modules might benefit from the proot environment.
  • Nmap: Essential network scanner for mapping networks and discovering services.
  • Wireshark (via TShark): For packet capturing and analysis. While full Wireshark GUI isn't native, tshark command-line utility offers substantial packet analysis capabilities.
  • Aircrack-ng suite: For Wi-Fi security auditing. True packet injection often requires root but some scanning functionalities might be accessible.
  • Python 3: For scripting and leveraging libraries like Scapy for network manipulation.
  • Git: To clone repositories and install tools directly from sources like GitHub.

Remember, the effectiveness of these tools is amplified when you understand their underlying principles and limitations, especially within constrained environments like Termux on a non-rooted device.

FAQ: Frequently Asked Questions

Q1: Will using proot in Termux trip any security flags or allow me to bypass app-level security measures on my Android device?
A: No, proot operates entirely within the Termux application sandbox. It does not modify the Android operating system itself. Therefore, it will not bypass Android's security mechanisms, nor will it trip Knox, SafetyNet, or similar attestation systems that check the integrity of the core OS.

Q2: Can I use proot to gain root access for games or apps that require root for modifications?
A: Generally, no. Games and apps that specifically check for true OS-level root privileges will likely not detect the simulated root provided by proot. These applications often look for specific system files or properties that only exist on a genuinely rooted system.

Q3: What are the main differences between using proot and actually rooting my Android device?
A: The fundamental difference is the scope of access. Rooting your device grants you privileged access to the entire Android operating system, allowing you to modify system files, flash custom ROMs, and run applications that deeply interact with the kernel. Proot, conversely, only simulates root privileges within the isolated Termux environment, affecting only the commands and applications run through it.

Q4: Are there any security risks associated with using proot in Termux?
A: The primary risk comes from installing untrusted software within the proot environment. If you download and run malicious scripts or binaries, they could still compromise the Termux environment or, if Termux has been granted broad storage permissions, potentially affect your device's data. Always verify the source of the software you install.

Q5: How can I exit the proot root shell?
A: Simply type the exit command in the proot shell, or press `Ctrl + D`. This will return you to the standard Termux shell.

The Contract: Securing Your Digital Frontier

You've navigated the labyrinth, coaxed root-like privileges from a seemingly ordinary terminal, all without breaking the seals of your device's native security. The power to perform more advanced operations is now at your fingertips, albeit within the carefully constructed walls of Termux.

Your challenge: Identify a common vulnerability in a web application (e.g., SQL Injection, XSS) and outline how you would leverage the tools available within your proot-enabled Termux environment to both detect and then attempt to exploit it. Detail the specific commands you would use, the expected output, and, critically, the limitations you'd encounter due to the simulated root environment.

Guía Definitiva para Obtener Privilegios Root en Termux sin Rootear tu Dispositivo Android

La línea entre el usuario común y el administrador de sistemas se difumina en el vasto universo de Android. Millones de dispositivos portátiles, poderosos como estaciones de trabajo de antaño, pero encapsulados tras muros de permisos restrictivos. ¿Y si te dijera que puedes saltarte esas barreras, sin necesidad de abrir el capó de tu dispositivo? Hoy no hablamos de flashear ROMs ni de exponer tu máquina a riesgos innecesarios. Hablamos de RootTH, una herramienta inteligente que opera en las sombras de la terminal Termux, otorgándote el manto de root de manera virtual.

En el mundo del análisis de seguridad móvil y la ingeniería inversa, el acceso root es moneda de cambio. Permite inspeccionar configuraciones profundas del sistema, capturar tráfico de red a bajo nivel o ejecutar herramientas de pentesting avanzadas que simplemente no funcionan en un entorno sandboxed. Sin embargo, el proceso de rootear un dispositivo, aunque potente, viene con su propia carga de riesgos: anulación de garantías, posibles problemas de seguridad e incompatibilidades con ciertas aplicaciones bancarias o de juegos. Aquí es donde RootTH entra en escena, ofreciendo una simulación conveniente y sin compromisos.

¿Qué es RootTH y Cómo Funciona?

RootTH no es magia negra, es ingeniería social aplicada a la capa de sistema operativo. En lugar de modificar el kernel de tu Android para obtener privilegios de root permanentes, esta herramienta aprovecha la potencia de proot. ¿Qué es proot? Es una herramienta de espacio de usuario que simula un entorno de root, redirigiendo las operaciones del sistema de archivos y de llamadas al sistema para que parezcan que se ejecutan con privilegios elevados, sin serlo realmente a nivel de hardware subyacente.

Piensa en ello como un actor con un disfraz muy convincente. Desde la perspectiva de las aplicaciones y comandos que se ejecutan dentro de la sesión de Termux emulada por RootTH, todo parece estar operando con permisos de administrador. Esto te permite instalar paquetes que normalmente requerirían acceso root, modificar archivos del sistema (dentro del entorno de Termux, claro está) y ejecutar scripts de pentesting que exigen la elevación de privilegios. Es una solución elegante para escenarios donde la instalación de un root completo no es viable o deseable.

"La mayor debilidad de un sistema de seguridad es la dependencia de la confianza. Cuando la confianza se rompe, la arquitectura se desmorona." - cha0smagick

Arsenal del Operador/Analista

  • Terminal Esencial: Termux (disponible en F-Droid y GitHub. ¡Evita la versión de Play Store por actualizaciones obsoletas!).
  • Herramienta de Simulación: RootTH.
  • Software de Virtualización/Emulación: proot (la base de RootTH).
  • Control de Versiones: Git para clonar repositorios.
  • Análisis Avanzado: Para investigaciones más profundas en Android, considera herramientas y frameworks como MobSF (Mobile Security Framework) o la inversión en una certificación de seguridad móvil.
  • Libros Clave: "The Rootkit Arsenal: Prevention and Detection" (aunque orientado a sistemas de escritorio, los principios de ocultación y acceso son universales) o "Android Hacker's Handbook" para comprender la arquitectura en detalle.

Taller Práctico: Instalación y Uso de RootTH

Domina la simulación de root en Termux. Sigue estos pasos rigurosamente:

  1. Paso 1: Preparación del Entorno

    Abre tu terminal Termux. Antes de instalar nada, asegúrate de que tu sistema esté al día. Esto es fundamental para evitar conflictos de dependencias y aprovechar las últimas correcciones de seguridad.

    
    $ apt update && apt upgrade -y
        

    A continuación, necesitas otorgar permisos a Termux para acceder al almacenamiento de tu dispositivo. Aunque RootTH opera principalmente dentro del entorno de Termux, algunas herramientas de pentesting que podrías ejecutar posteriormente podrían necesitar acceso a archivos externos.

    
    $ termux-setup-storage
        
  2. Paso 2: Instalación de Git y Clonación del Repositorio

    Para descargar RootTH, necesitarás Git. Si no lo tienes instalado, puedes hacerlo con el siguiente comando:

    
    $ pkg install git -y
        

    Ahora, clona el repositorio oficial de RootTH desde GitHub. Este comando descargará todos los archivos necesarios para la herramienta a tu directorio actual de Termux.

    
    $ git clone https://github.com/TermuxHacking000/RootTH
        
  3. Paso 3: Configuración y Ejecución de RootTH

    Navega al directorio que acabas de clonar. Una vez dentro, debes otorgar permisos de ejecución al script principal de RootTH. Este paso es crucial para que el script pueda ser ejecutado como un programa.

    
    $ cd RootTH
    $ chmod 711 RootTH.sh
        

    Finalmente, ejecuta el script instalador. Este proceso configurará proot y preparará tu entorno de Termux para simular el acceso root.

    
    $ ./RootTH.sh
        
  4. Paso 4: Verificación de la Simulación Root

    Una vez que el script de instalación haya completado su ejecución, cada vez que desees activar la simulación de root en tu sesión de Termux, simplemente deberás ejecutar el siguiente comando:

    
    root
        

    Puedes verificar si la simulación está activa intentando ejecutar comandos que normalmente requerirían permisos de root, como listar directorios del sistema o intentar instalar paquetes sensibles.

Consideraciones de Seguridad y Limitaciones

Es vital entender que RootTH proporciona una simulación de root. No te otorga control total sobre el sistema operativo Android subyacente. Esto significa:

  • No anula la garantía: Dado que no se modifica el bootloader ni se instala un recovery personalizado, tu garantía de dispositivo permanece intacta.
  • Entorno Sandboxed: Las operaciones se limitan principalmente al entorno de Termux. No podrás acceder o modificar archivos fuera de los permisos otorgados a Termux (a menos que hayas habilitado el acceso al almacenamiento con termux-setup-storage).
  • Compatibilidad de Aplicaciones: Las aplicaciones que realizan verificaciones profundas del sistema para detectar un root real seguirán indicando que el dispositivo no está rooteado.
  • Seguridad del Dispositivo: Si bien RootTH es una herramienta de acceso controlado, la ejecución de herramientas de pentesting dentro de Termux, incluso con simulación de root, debe hacerse con extrema precaución. Cualquier comando ejecutado con privilegios elevados, incluso simulados, tiene el potencial de causar inestabilidad si se usa incorrectamente. Asegúrate de entender completamente un comando antes de ejecutarlo.

Para los profesionales de la ciberseguridad móvil, entender estas limitaciones es clave. RootTH es una herramienta de conveniencia para tareas específicas, no un reemplazo para el root real cuando las funcionalidades avanzadas son estrictamente necesarias. Si tu objetivo es un pentesting profundo de aplicaciones móviles o análisis forense a nivel de sistema, la exploración de métodos de root más permanentes (y sus implicaciones de seguridad) puede ser inevitable. Herramientas como Magisk ofrecen un enfoque más robusto para la gestión de root y módulos, permitiendo una mayor flexibilidad y control sobre la seguridad del dispositivo.

Veredicto del Ingeniero: ¿Vale la Pena RootTH?

RootTH es una solución ingeniosa y práctica para un nicho específico: el usuario de Termux en Android que necesita realizar operaciones que requieren permisos de root dentro de su entorno de terminal, pero sin el compromiso de rootear su dispositivo. Es una herramienta de utilidad excepcional para:

  • Ejecutar herramientas de red que requieren acceso a interfaces de bajo nivel (como algunas herramientas de escaneo de red).
  • Instalar y configurar software en Termux que normalmente estaría bloqueado por las restricciones de permisos de Android.
  • Experimentar y aprender sobre la gestión de privilegios en entornos Linux/Unix sin riesgo para el dispositivo principal.

Pros:

  • Sin Riesgo de Garantía: No requiere rootear el dispositivo.
  • Fácil de Instalar y Usar: Proceso directo a través de Termux.
  • Eficiente para Tareas Específicas: Proporciona el nivel de acceso necesario para muchas operaciones comunes en Termux.
  • Ideal para Aprendizaje: Permite explorar comandos y herramientas que requieren root en un entorno seguro.

Contras:

  • Simulación, No Root Real: Limitado al entorno de Termux y no otorga control total del sistema Android.
  • Incompatible con Aplicaciones Sensibles: Las apps que detectan root de forma rigurosa lo identificarán como tal.

En resumen, si ya utilizas Termux para tareas de desarrollo, scripting o pentesting en tu dispositivo Android y te encuentras ocasionalmente con la barrera de los permisos, RootTH es una adición invaluable a tu arsenal. Es el tipo de herramienta que te saca de un apuro sin exponerte innecesariamente. Para integrarlo en tu flujo de trabajo, considera la inversión en aplicaciones de seguridad y productividad para Android que permitan la ejecución de scripts avanzados. Asegúrate de explorar plataformas de bug bounty para móviles; el conocimiento adquirido con herramientas como esta te posicionará favorablemente.

Preguntas Frecuentes

¿Es RootTH seguro de usar en mi dispositivo Android?

RootTH es una herramienta de simulación de root. No modifica el sistema operativo de tu Android de forma permanente ni anula la garantía. Sin embargo, cualquier comando ejecutado con privilegios elevados dentro de Termux, sea real o simulado, debe ser comprendido para evitar inestabilidad. Úsala con la misma precaución que cualquier otra herramienta de línea de comandos.

¿Puedo usar RootTH para hacer root a mi dispositivo permanentemente?

No. RootTH utiliza proot para simular el acceso root dentro del entorno de Termux. No realiza un root permanente en el dispositivo Android.

¿Qué diferencia hay entre RootTH y rootear mi dispositivo Android?

Rootear tu dispositivo modifica el sistema operativo para otorgar acceso de superusuario completo. RootTH simula este acceso solo dentro de la terminal Termux mediante proot, sin alterar el sistema subyacente y sin anular la garantía.

¿Qué tipo de tareas puedo realizar con RootTH activado?

Puedes ejecutar comandos y aplicaciones dentro de Termux que típicamente requieren permisos de root, como instalar ciertos paquetes, modificar archivos de configuración dentro del entorno de Termux, o utilizar herramientas de red que necesiten acceso a interfaces de bajo nivel específicas de la simulación.

El Contrato: Asegura tu Perímetro Digital

Has aprendido a instalar y utilizar RootTH, una herramienta que te permite caminar por el lado oscuro de los privilegios de root en Termux sin dejar huella permanente en tu dispositivo. Ahora, el desafío es aplicar este conocimiento de forma inteligente. El contrato que firmas al dominar estas técnicas es contigo mismo: usar este poder para comprender, proteger y, cuando sea necesario, evaluar la seguridad, nunca para infringir.

Tu próxima misión, si decides aceptarla, es identificar una tarea común que realices en Termux y que normalmente esté limitada por permisos. Implementa RootTH, ejecuta la tarea y documenta tus hallazgos y cualquier diferencia observada. ¿Fue tan fluido como esperabas? ¿Encontraste alguna limitación inesperada? Comparte tus experiencias y el código que utilizaste en los comentarios. Demuéstrame que entiendes el equilibrio entre poder y responsabilidad.

Guía Definitiva: Instala Ubuntu en Termux y Desbloquea un Entorno Linux Completo en tu Móvil

La red es un campo de batalla, y tu móvil, una navaja suiza digital. En este oscuro rincón de la tecnología, donde los sistemas de escritorio se sienten pesados y lentos, surge Termux. Es más que una simple terminal; es el portal a un universo Linux directamente en tu bolsillo. Pero, ¿qué sucede cuando necesitas el poder de una distribución completa como Ubuntu, con todas sus herramientas y librerías, pero sin cargar con el peso de una máquina virtual o un dual-boot? La respuesta es tan audaz como efectiva: instalar Ubuntu dentro de Termux. Hoy no vamos a hablar de software de defensa; vamos a construir un entorno ofensivo y de desarrollo portátil.

Este no es un tutorial de usuario final para novatos que buscan un punto de acceso fácil. Esto es para el ingeniero digital, para el profesional que entiende el valor de tener un laboratorio de pruebas, un entorno de compilación o un sandboxing portátil. Si buscas la máxima flexibilidad y control sobre tu dispositivo Android, sigue este camino. Ignorar estas técnicas es dejar la puerta abierta a la complacencia, y la complacencia en nuestro campo se paga cara.

Tabla de Contenidos

Introducción Técnica: El Poder de un Entorno Linux Portátil

Termux, en su esencia, proporciona un entorno Linux minimalista en Android. Permite la instalación de una gran cantidad de paquetes a través de su gestor de paquetes `pkg` (un wrapper para `apt`). Sin embargo, para escenarios más complejos, especialmente aquellos que requieren un sistema operativo completo, o dependencias muy específicas, simplemente no es suficiente. Aquí es donde entra Proot. Proot es una herramienta que permite simular un entorno de usuario raíz sin necesidad de acceso root real al dispositivo. Esto es CRUCIAL, ya que nos permite instalar y ejecutar distribuciones completas como Ubuntu, con su propio sistema de ficheros y directorios, de manera aislada.

Imagina tener un servidor de desarrollo, un entorno de pentesting, o una plataforma de análisis de datos, todo dentro de tu smartphone. Esto abre un abanico de posibilidades, desde la automatización de tareas hasta la ejecución de scripts y herramientas que normalmente requerirían un PC. Para cualquier profesional de la ciberseguridad o desarrollador, esta portabilidad es un activo invaluable. No te conformes con la terminal básica; expande tu horizonte.

Preparación del Terreno: Tu Terminal Termux

Antes de sumergirnos en la instalación de Ubuntu, debemos asegurar que nuestro entorno Termux esté optimizado. Un sistema desactualizado es un sistema vulnerable, y en nuestro campo, la negligencia se castiga severamente. El primer paso es siempre la actualización y el saneamiento de los paquetes existentes. No te saltes este paso; es la base de tu fortaleza.

Comandos como `apt update` y `apt upgrade` son tus aliados. Ejecútalos religiosamente. Además, necesitaremos herramientas específicas para el despliegue de la distribución. `git` es indispensable para clonar repositorios, y `proot` es la clave para simular ese entorno de superusuario que Ubuntu necesita. Asegúrate de tenerlos instalados.

apt update && apt upgrade -y apt install git -y apt install proot -y apt install chmod -y

El flag `-y` es tu amigo para automatizar confirmaciones, pero úsalo con conocimiento. En entornos de producción crítica, cada confirmación es una oportunidad para una revisión manual. Aquí, en este tutorial, aceleramos el proceso.

"La preparación es la clave del éxito. No improvises cuando la seguridad de tus sistemas dependa de ello."

Instalación de Ubuntu Paso a Paso: El Walkthrough

Ahora llega el momento de la verdad. Vamos a desplegar Ubuntu utilizando un script de terceros bien conocido y mantenido. La comunidad de Termux es activa, y los scripts desarrollados por usuarios como MFDGaming simplifican enormemente el proceso. Recuerda: la fuente del script es importante. Siempre evalúa la confianza de los repositorios que utilizas. En nuestro caso, este es un método probado y recurrente en la comunidad.

Paso 1: Clonar el Repositorio

Utilizaremos `git` para descargar el script y los archivos necesarios del popular repositorio en GitHub. Este repositorio contiene el script `ubuntuintermux.sh` y los archivos de configuración para montar Ubuntu.

git clone https://github.com/MFDGaming/ubuntu-in-termux

Paso 2: Navegar al Directorio

Una vez clonado, debemos movernos dentro del directorio recién creado para acceder al script.

cd ubuntu-in-termux

Paso 3: Otorgar Permisos de Ejecución

El script necesita permisos de ejecución para poder ser lanzado. Usamos `chmod` para esto.

chmod +x ubuntuintermux.sh

Muchos descuidan este paso, lo que lleva a errores de "permiso denegado". No seas uno de ellos.

Paso 4: Ejecutar la Instalación

Este es el comando que inicia el proceso de descarga e instalación de la imagen de Ubuntu. El script se encargará de descargar una imagen precompilada y configurarla para ejecutarse dentro de Termux usando `proot`.

./ubuntuintermux.sh

La instalación puede tomar algún tiempo, dependiendo de tu conexión a internet y las especificaciones de tu dispositivo. Verás un flujo de texto indicando el progreso, la descarga de la imagen de Ubuntu y su extracción.

Primeros Pasos en tu Nuevo Entorno Ubuntu

Una vez que el script finaliza, tendrás un nuevo comando disponible en tu Termux: `ubuntu`. Ejecútalo para iniciar tu sesión de Ubuntu.

ubuntu

Serás recibido con un prompt de Ubuntu. ¡Felicidades, has desplegado con éxito un entorno Linux completo en tu dispositivo móvil!

Ahora, el mundo es tu ostra. Puedes instalar cualquier paquete de Ubuntu usando `apt` dentro de esta sesión.

# Dentro de la sesión de Ubuntu apt update && apt upgrade -y apt install neofetch python3 nano htop -y neofetch

--

El `neofetch` te mostrará la información del sistema, confirmando que estás ejecutando Ubuntu, y el `htop` te dará un vistazo a los procesos y el uso de recursos. Esto te da una visión clara del entorno que acabas de crear.

Arsenal del Operador: Herramientas Esenciales

Para operar eficazmente en este nuevo entorno, necesitarás un conjunto de herramientas. Aquí, en Sectemple, creemos en el equipamiento adecuado para cada misión:

  • Termux:API: Permite que tus scripts accedan a las características del dispositivo Android, como la cámara, la ubicación, los contactos, etc. Fundamental para automatización avanzada.
  • Vim / Neovim: Un editor de texto potente y eficiente, preferido por muchos operadores para la edición rápida de scripts y archivos de configuración.
  • Python 3 con pip: Imprescindible para desarrollo, scripting, análisis de datos y automatización. Asegúrate de instalar `python3-pip`.
  • Node.js: Si trabajas con desarrollo web o herramientas basadas en JavaScript, es esencial.
  • Docker (con PRoot en algunos casos): Aunque más complejo de configurar, dockerizar tus aplicaciones te da portabilidad y aislamiento de dependencias. Explora `linuxserver.io` para imágenes optimizadas.
  • Libros Clave: "The Hacker Playbook" de Peter Kim para estrategias de pentesting, y "Python Crash Course" para afianzar tus habilidades de scripting.
  • Cursos: Considera certificaciones ofensivas como la OSCP. Aunque se centran en entornos de escritorio, los principios de hacking y la mentalidad son transferibles.

No subestimes el poder de un buen editor o de una herramienta de scripting robusta. Son tus aliados para maximizar la eficiencia y reducir el margen de error.

Preguntas Frecuentes

¿Necesito acceso root en mi dispositivo Android para instalar Ubuntu en Termux?
No, gracias a Proot, no necesitas acceso root. Proot simula un entorno de root sin requerir privilegios de superusuario en el sistema anfitrión.

¿Puedo ejecutar aplicaciones gráficas de Ubuntu?
Sí, pero requiere configuración adicional. Necesitarás instalar un servidor X11 en Android (como XServer XSDL) y configurar las variables de entorno de DISPLAY para que las aplicaciones gráficas puedan enviar su salida a ese servidor X.

¿Es seguro usar scripts de GitHub para instalar distribuciones?
Siempre existe un riesgo inherente al ejecutar scripts de fuentes externas. Es crucial verificar la reputación del repositorio, leer el código del script si es posible, y entender lo que hace. En este caso, el repositorio de MFDGaming es ampliamente utilizado y considerado seguro por la comunidad de Termux.

¿Qué hago si la instalación falla?
Verifica que todas las dependencias (git, proot, chmod) estén correctamente instaladas y actualizadas. Asegúrate de tener suficiente espacio de almacenamiento en tu dispositivo. Revisa los mensajes de error del script para identificar el problema específico.

El Contrato: Tu Desafío Digital

Has configurado tu propio entorno Ubuntu en Termux. Es un primer paso audaz. Ahora, el desafío:implementa un servidor web básico (Nginx o Apache) dentro de tu sesión de Ubuntu en Termux y hazlo accesible desde tu red local (LAN). Documenta el proceso y tus hallazgos. ¿Qué puertos necesitas abrir? ¿Cómo configuras el firewall de Termux (si aun aplica) o el del servidor X11? ¿Qué implicaciones de seguridad tiene exponer servicios desde tu móvil?

Este ejercicio te obligará a interactuar con la configuración de red y los servicios a un nivel más profundo. No te limites a seguir instrucciones ciegamente; comprende las implicaciones. La maestría no se alcanza sin práctica y sin desmantelar sistemas para entender cómo funcionan. Ahora, ve y construye.