STRATEGY INDEX
- Introduction: The AI Gold Rush
- The Rocket Advantage: Your No-Code AI Foundry
- Monetization Blueprint: Turning AI Apps into Revenue Streams
- The Ultimate Toolkit for Digital Operations
- Realistic Expectations and Risk Assessment
- Ethical Considerations and Disclaimers
- FAQ: Mission Debrief
- About The cha0smagick
Introduction: The AI Gold Rush
The year is 2025. The air crackles with the potential of Artificial Intelligence, and whispers of fortunes made in the digital realm are everywhere. Many aspiring operatives believe that building sophisticated AI applications requires deep technical expertise and years of coding experience. This is a common misconception. The real intelligence lies in identifying the leverage points – the tools and strategies that allow for rapid deployment and monetization. This dossier details the absolute laziest, yet most effective, method to enter the AI application market this year, requiring zero traditional coding skills. We're talking about maximizing ROI with minimal effort through strategic tool utilization and a pragmatic approach to business development.
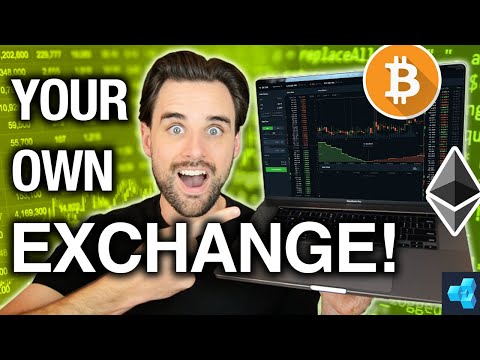
The Rocket Advantage: Your No-Code AI Foundry
Forget the endless lines of Python or JavaScript. The modern digital operative leverages platforms that abstract complexity. Our primary tool in this mission is Rocket. This is not just an app builder; it's a launchpad. Rocket allows you to construct functional, AI-powered applications with an intuitive, visual interface. Think drag-and-drop functionality fused with powerful AI integrations. The beauty of Rocket lies in its sheer efficiency. Within hours, not months, you can conceptualize, build, and even deploy a viable product.
Key Features of Rocket for Efficient Deployment:
- Visual Development Environment: Design your app's user interface and logic without writing code.
- Integrated AI Models: Seamlessly incorporate AI capabilities like natural language processing, image recognition, or predictive analytics.
- Templates and Pre-built Components: Accelerate development with pre-designed structures and functionalities.
- Deployment Options: Launch your application across various platforms with ease.
The strategic advantage here is clear: reduced time-to-market, lower development costs, and the ability to iterate rapidly based on user feedback. This is the essence of lean digital operations.
Actionable Intelligence: Explore Rocket's capabilities at www.rocket.new. Treat this as your primary engineering bay. Remember, understanding the tool is paramount, even if you aren't writing its underlying code.
Monetization Blueprint: Turning AI Apps into Revenue Streams
Building an app is only half the mission; generating revenue is the objective. The "laziest" monetization strategies focus on high-margin, low-overhead models.
1. Subscription Services (SaaS Model):
Offer your AI application as a service on a recurring subscription basis. This provides predictable income. Identify a niche problem that your AI app can solve uniquely or more effectively than existing solutions. For example, an AI-powered content summarizer for busy professionals, or an AI tool that generates marketing copy variations.
2. Premium Features/Freemium Model:
Offer a basic version of your app for free to attract a large user base, then charge for advanced features, increased usage limits, or priority support. This allows users to experience the value before committing financially.
3. API Access:
If your AI application has a unique algorithm or data processing capability, consider offering access via an API. Other developers or businesses can then integrate your AI's power into their own products, and you charge based on usage (e.g., per API call).
4. Niche Marketplaces:
Many platforms exist for selling specialized apps or AI solutions. Leverage these marketplaces to reach targeted audiences actively looking for your type of product.
To truly maximize efficiency, leverage platforms that support these monetization models natively or integrate easily with payment gateways. The goal is to automate as much of the sales and delivery process as possible.
The Ultimate Toolkit for Digital Operations
Beyond the core app-building platform, a few essential tools amplify your operational efficiency:
- Full-Cycle App Development & Launch: For those aiming for a comprehensive build and market launch, the blueprint provided at mikeyno-code.com/program offers a structured path from concept to App Store deployment.
- Exclusive Intelligence Briefings: Stay ahead of the curve with curated insights. Join the exclusive newsletter at mikeyno-code.com/newsletter for tactical advice and market analysis.
- Cloud Hosting & Infrastructure: For scalable SaaS applications, understanding cloud platforms is crucial. While Rocket handles much of the app build, robust hosting ensures performance and uptime. Consider providers like AWS, Google Cloud, or Azure for backend infrastructure. Optimizing cloud spend aligns with the 'lazy' profit maximization strategy.
- Payment Gateways: Integrate reliable payment processors like Stripe or PayPal to handle transactions seamlessly.
Realistic Expectations and Risk Assessment
This "laziest way" approach is about maximizing efficiency, not guaranteeing overnight success. The digital landscape is dynamic and competitive. It's critical to approach this with a clear-eyed perspective:
- Market Research is Non-Negotiable: Even with no-code tools, understanding your target audience and their pain points is fundamental. What problem are you solving? Is there a genuine market demand?
- Competition is Fierce: The low barrier to entry means many will attempt similar strategies. Differentiation through unique features, superior user experience, or targeted marketing is key.
- Time and Effort are Still Factors: While coding isn't required, conceptualizing, designing, marketing, and supporting an application still demand significant time and effort. "Lazy" refers to the technical implementation, not a lack of strategic input or operational diligence.
- Platform Dependency: Relying on no-code platforms means you are subject to their terms, pricing, and feature roadmaps. Diversification of tools or having a contingency plan is a mark of a seasoned operative.
A smart operational move is to also diversify your assets. For comprehensive financial management and exploring the digital asset ecosystem, consider opening an account on Binance and examining the crypto landscape.
Ethical Considerations and Disclaimers
EDUCATIONAL DISCLAIMER & RISK WARNING:
This content is purely for educational and informational purposes. It showcases software tools and business methodologies but does not promise or guarantee any specific outcomes or income levels. Engaging with business ventures inherently involves substantial risk, and the failure rate for new businesses is high. The results depicted are not typical; individual outcomes will vary significantly. No claims of income or guarantees are made. Achieving success requires considerable investment of time, effort, skill, and often, a degree of luck. This is not financial, legal, or professional advice. Always consult with licensed professionals before making critical business decisions. Furthermore, the tools and platforms mentioned may alter their features, pricing, or availability without notice. Some links may be affiliate links, providing a commission at no additional cost to you.
Realistic Expectations: Building a sustainable and successful business typically requires months, if not years, of dedicated effort. The majority of individuals attempting these strategies may not achieve significant financial returns. Past performance is definitively not indicative of future results. Market dynamics, competitive pressures, and evolving regulations can all impact the success of your venture.
By consuming this information, you acknowledge these inherent risks and assume full responsibility for any actions taken based on the intelligence provided.
FAQ: Mission Debrief
Q1: Can I really build a profit-generating AI app without any coding knowledge?
A1: Yes, with the right no-code tools like Rocket, you can build and launch functional AI apps. However, "lazy" refers to the technical build; strategic planning, marketing, and operational management still require significant input.
Q2: How quickly can I expect to make money?
A2: This varies greatly. While you can build an app quickly, generating significant income depends on market demand, your marketing efforts, the app's value proposition, and competitive factors. Realistic timelines range from months to years, not days.
Q3: What are the biggest risks involved?
A3: Key risks include market saturation, dependency on no-code platform changes, insufficient market demand, ineffective marketing, and underestimating the operational effort required beyond the initial build.
Q4: Are there alternatives to Rocket for no-code AI app development?
A4: Yes, the market offers various no-code and low-code platforms with AI integrations. Rocket is highlighted here for its efficiency and ease of use, aligning with the "laziest" approach, but exploring alternatives like Bubble, Adalo, or others with specific AI plugins is also viable.
About The cha0smagick
The cha0smagick is a seasoned digital operative, polimath engineer, and ethical hacker with deep roots in the trenches of cybersecurity and software development. Known for dissecting complex systems and transforming technical challenges into actionable blueprints, their expertise spans advanced programming, reverse engineering, data analysis, and the forefront of digital vulnerabilities. Operating under the alias "Sectemple," they decode the digital frontier, providing definitive guides and strategic intelligence for the discerning operative.
Your Mission, Should You Choose to Accept It:
Debriefing of the Mission:
You now possess the blueprint for entering the AI application market with minimal technical overhead. The path is laid out: leverage efficient no-code tools, understand the monetization strategies, and maintain realistic expectations. The next phase is execution. Identify your niche, build your MVP, and begin iterating. The digital frontier awaits your strategic deployment.