
The digital frontier is awash with untapped potential, and at its bleeding edge lies the world of Non-Fungible Tokens. Many see them as mere digital trinkets, but for the calculated few, they represent a revenue stream, a signature, a stake in the new digital economy. And the secret to scaling? Automation. Today, we're not just talking about minting one NFT; we're talking about building an army of unique digital assets, an entire collection, without touching a single line of code. This is the art of the possible, achieved through meticulous preparation and leveraging the right tools.
Table of Contents
Table of Contents
- Introduction: The Generative Art Gold Rush
- Glimpse into the Digital Vault: NFT Collection Examples
- The Blueprint of Uniqueness: Essential Art Layers
- Acquiring the Master Key: Downloading the Generation Code
- Setting Up Your Command Center: Visual Studio Code
- The Genesis Configuration: Setting Up the Environment
- Injecting Your Vision: How to Add Your Art
- Unleashing the Algorithm: The Generation Process
- The Exit Strategy: Wrapping Up
- Frequently Asked Questions
- Arsenal of the Digital Alchemist
- Practical Workshop: Generating Your First 100 NFTs
Introduction: The Generative Art Gold Rush
The world of NFTs has moved beyond the single, groundbreaking piece. The real power and potential for scale lie in the creation of vast, diverse collections. Imagine generating not just one digital masterpiece, but thousands, each with its own unique characteristics and rarity. This isn't magic; it's engineering. And the beauty of the modern ecosystem is that you no longer need to be a seasoned developer to orchestrate such a feat. This guide is your operational manual for building an NFT collection of 10,000+ unique assets, no coding knowledge required.
We'll dissect the process, from conceptualizing your art to the final generation, ensuring each token is distinct and ready for the market. Think of this as reverse-engineering a successful digital asset drop, but from the perspective of the creator who wants to maximize output and minimize technical friction. The goal: efficiency, volume, and uniqueness.
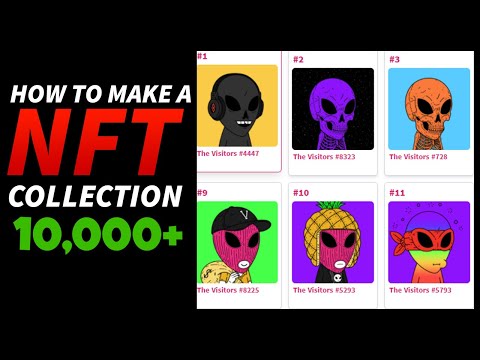
Glimpse into the Digital Vault: NFT Collection Examples
Before diving into the mechanics, let's contextualize the objective. Successful NFT collections are built on layers of traits that define uniqueness and rarity. Consider wildly popular projects like CryptoPunks or Bored Ape Yacht Club. Each character possesses a distinct set of attributes: background, body type, accessories, facial expressions, and more. These traits are not randomly assigned; they are thoughtfully designed and combined algorithmically to produce a massive, yet controlled, set of variations.
"In the realm of digital scarcity, the perceived value is often amplified by the complexity and uniqueness of the underlying traits. A thousand variations are more compelling than ten." - cha0smagick
Understanding this layered approach is crucial. It's the bedrock upon which generative art is built. By defining these components, you create the building blocks for thousands of potentially unique digital identities.
The Blueprint of Uniqueness: Essential Art Layers
The core of any generative NFT collection lies in its layers. These are the individual image assets that will be programmatically combined to create your final NFTs. A typical structure might include:
- Background: The canvas upon which your NFT resides. This could range from simple solid colors to intricate patterns or scenes.
- Body/Base: The foundational character or element that forms the core of the NFT.
- Eyes: Different styles, colors, or expressions for the eyes.
- Mouth: Various mouth shapes or expressions.
- Headwear/Accessories: Hats, helmets, glasses, jewelry, or other adornments.
- Special Traits: Rare elements that appear infrequently, adding to the collectibility.
The key is to create multiple variations for each layer. The more variations you have per layer, and the more layers you introduce, the exponentially higher the number of unique combinations you can achieve. For a collection of 10,000+, strategic planning of these layers is paramount. Each layer should be exported as a separate PNG file, typically with a transparent background, ensuring seamless compositing.
Acquiring the Master Key: Downloading the Generation Code
The heavy lifting of combining these layers and generating metadata is handled by specialized scripts. Fortunately, the open-source community has provided robust solutions. For this operation, we'll leverage a well-established generative art script. These scripts are designed to read your layer files, randomly combine them according to defined probabilities (for rarity), and output the final images and their corresponding JSON metadata files.
You can typically find such scripts on platforms like GitHub. A common approach involves cloning a repository that contains the necessary code structure. This is where version control systems like Git become indispensable. Even if you're not a coder, understanding basic Git commands like `clone` is a valuable skill for accessing these resources.
Essential Downloads:
- The generative art script (e.g., from GitHub).
- Your prepared art layers (PNG format).
If you're serious about building significant collections, investing in a robust generative script is non-negotiable. While free options exist, for high-volume, production-ready outputs, consider exploring premium tools or scripts that offer advanced rarity control and metadata management. For example, some platforms offer bundled solutions that provide a more integrated workflow, although they come with a price tag – a worthy investment for serious collectors and creators.
Setting Up Your Command Center: Visual Studio Code
While you won't be writing code, you'll need an environment to manage the script files and your art assets. Visual Studio Code (VS Code) is the industry standard for this. It's a powerful, free, and highly extensible code editor that makes navigating file structures and running commands much more intuitive.
Downloading and installing VS Code is straightforward. Once installed, you'll use it to open the folder containing the generative script and your art layers. This provides a centralized hub for your entire collection generation process.
Don't underestimate the power of a well-configured IDE. A professional setup like VS Code streamlines workflows and reduces errors. While any text editor can technically open the files, an IDE offers features like syntax highlighting (even for configuration files), integrated terminal access, and extensions that can significantly speed up your process. For those looking to truly professionalize their NFT creation pipeline, exploring VS Code extensions for JSON or even basic scripting can be a game-changer, even without deep coding knowledge.
The Genesis Configuration: Setting Up the Environment
After downloading the necessary components, the next critical step is setup. This usually involves:
- Extracting the Generator Script: Unzip or clone the repository containing the generative script into a dedicated folder on your computer.
- Organizing Art Layers: Create subfolders within the script's directory to house your art layers. A common structure is to have a folder for each trait type (e.g., `backgrounds`, `bodies`, `eyes`).
- Configuration Files: Many generative scripts use configuration files (often in JSON or YAML format) where you define the layers, their order, rarity percentages, and output settings. You'll edit these files to match your art and desired collection parameters.
This stage is where meticulous organization pays off. Ensure your file names are consistent and your layers are correctly placed. Any misconfiguration here can lead to unexpected results or failed generations. For those venturing into this space seriously, consider looking into cloud-based development environments or containerization (like Docker) for reproducible setups, although this delves into more technical territory.
Injecting Your Vision: How to Add Your Art
This is where your artistic input truly comes into play. Once your environment is set up and the script is configured, you'll place your prepared PNG art layers into the designated folders. For example, if your script expects an `eyes` folder, you'll place all your different eye variations there.
The configuration file is your command panel for telling the script how to use these layers. You'll specify which folders correspond to which traits and, crucially, the probability of each trait appearing. This is how you define rarity. For a 10,000+ collection, you'll want a strategic distribution of traits to ensure some are common, some uncommon, and a few are exceptionally rare.
Example Configuration Snippet (Conceptual):
{
  "layers": [
    {"id": "background", "directory": "backgrounds", "rarity": 100},
    {"id": "body", "directory": "bodies", "rarity": 100},
    {"id": "eyes", "directory": "eyes", "rarity": [
      {"name": "normal", "chance": 80},
      {"name": "laser", "rarity": 15},
      {"name": "glowing", "rarity": 5}
    ]}
    // ... more layers
  ],
  "output_count": 10000,
  "output_format": "png"
}
Mastering this configuration is key to creating a balanced and desirable collection. It’s the difference between a random jumble of images and a curated set of digital assets with real collector appeal. If you find yourself struggling with complex rarity balancing, consulting with experienced NFT project creators or utilizing advanced generative art platforms (which often have visual interfaces for this) can be beneficial.
Unleashing the Algorithm: The Generation Process
With your art layers in place and the configuration set, you're ready to execute the generation script. This is typically done via the terminal within VS Code or your chosen environment. The command will vary depending on the script, but it often looks something like:
node generate.js
or
python generate.py --count 10000
The script will then begin its work: iterating through your layers, selecting traits based on their defined rarities, compositing the images, and saving them. Simultaneously, it will generate a JSON metadata file for each image. This metadata is critical as it contains the details of the NFT (name, description, attributes) that will be read by marketplaces and blockchain explorers.
Monitor the process for any errors. The output will typically be a folder containing your generated images and another folder for the metadata. This is your raw collection, ready for the next phase: metadata validation and deployment.
"The beauty of generative art is the infinite possibility within a defined system. It scales your creative output beyond human capacity for manual execution." - cha0smagick
The Exit Strategy: Wrapping Up
Congratulations, operator. You've successfully orchestrated the creation of a potentially massive NFT collection without writing a single line of code. You've leveraged existing tools, organized your assets, and executed the generation process. The output is a set of unique digital assets and their corresponding metadata, the essential ingredients for launching on any NFT marketplace or blockchain.
Remember, this process is iterative. You can refine your art, adjust rarity settings, and regenerate your collection until you achieve the desired outcome. The core technical hurdle has been overcome, leaving you to focus on the artistic curation and the strategic launch of your collection.
Frequently Asked Questions
Q1: How many unique NFTs can I create?
A: The number of unique NFTs you can create is the product of the number of variations in each layer, assuming each layer is independent. For example, if you have 10 backgrounds, 10 bodies, 20 eyes, and 30 accessories, you can generate 10 * 10 * 20 * 30 = 60,000 unique combinations.
Q2: What if I make a mistake in my art layers after generating?
A: You'll need to correct the individual art layer(s) in your source files and then re-run the generation script. Ensure you have backups of your original layers and the script configuration before regeneration.
Q3: Do I need to pay for the generative art script?
A: Many excellent generative art scripts are available for free on platforms like GitHub under open-source licenses. However, premium tools and platforms exist that offer more advanced features, support, and user-friendly interfaces, often for a fee.
Q4: How is the metadata generated?
A: The generative script typically reads your layer configuration and art files to automatically create JSON metadata files for each generated NFT. These files describe the NFT's attributes, which are essential for marketplaces to display them correctly.
Q5: What's the next step after generating the image and metadata files?
A: After generation, you'll need to validate your metadata, potentially upload your images to a decentralized storage solution like IPFS, and then deploy a smart contract (e.g., ERC721) on your chosen blockchain to manage and mint your NFTs.
Arsenal of the Digital Alchemist
To truly master the generative NFT space, one must be equipped with the right tools. This isn't about fancy gadgets; it's about efficiency and power.
- Generative Art Scripts: Look for open-source repositories on GitHub. Popular choices often involve JavaScript (Node.js) or Python.
- Visual Studio Code: The indispensable IDE for managing files and running scripts.
- Git: Essential for downloading scripts from repositories and managing changes.
- Image Editing Software: Adobe Photoshop, GIMP (free), or Affinity Photo for creating and manipulating your art layers.
- IPFS (InterPlanetary File System): For decentralized storage of your NFT assets. Tools like Pinata simplify this.
- Smart Contract Development Tools: Remix IDE, Hardhat, or Truffle for deploying NFTs on the blockchain.
- Premium Generative Art Platforms: For more complex needs or integrated workflows, platforms like NiftyKit, ThirdDrawer, or others offer comprehensive solutions (often subscription-based).
- Recommended Reading: "The Art of Generative Design" by MIT Press (for foundational concepts) and various online documentation for ERC721 smart contracts.
Practical Workshop: Generating Your First 100 NFTs
Let's put theory into practice. We'll simulate creating a small, proof-of-concept collection.
- Set up your workspace: Create a new folder named `my_nft_collection`. Inside it, create subfolders: `layers`, `output_images`, `output_metadata`.
-
Prepare simple layers: In the `layers` folder, create three more subfolders: `background`, `body`, `eyes`.
- Create 2 background PNGs (e.g., `blue.png`, `red.png`).
- Create 1 body PNG (e.g., `base.png`).
- Create 3 eye PNGs (e.g., `normal.png`, `happy.png`, `surprised.png`).
- Find a simple generator script: Search GitHub for "simple nft generator javascript" and clone a suitable repository into your `my_nft_collection` folder. Let's assume the script is named `generate.js` and expects layers in a `layers` directory.
- Configure the script (if needed): Open `generate.js`. You might need to adjust the `output_count` to `100` and ensure it correctly points to your `layers` folder and `output_images`/`output_metadata` folders. The number of traits per layer will usually be auto-detected.
-
Run the generator: Open your terminal in VS Code, navigate to your `my_nft_collection` folder, and execute:
node generate.js - Verify output: Check your `output_images` and `output_metadata` folders. You should have 100 unique PNGs and their corresponding JSON metadata files, combining your layers.
This hands-on approach solidifies understanding. Experiment with different numbers of layers and traits to see how the uniqueness potential grows.
The Contract: Mastering Your Generative Output
You've seen the blueprint, acquired the tools, and executed the generation. Now, the real challenge: scaling with integrity. While this guide focuses on the "no-code" aspect of asset generation, deploying these assets to a blockchain is where the technical depth truly lies. The metadata must be perfect, the smart contract robust, and the storage immutable. Are you prepared to bridge the gap between generative art and blockchain reality? Demonstrate your understanding by outlining the critical security considerations for smart contract deployment of a large NFT collection.
Share your thoughts and code snippets in the comments below. Let's build the future, one layer at a time.
