
The glow of the terminal screen is your only ally in the dead of night. On the streets of the digital underworld, a compromised mobile device can be both a liability and a powerful reconnaissance tool. Termux, a terminal emulator for Android, is a clandestine operative's best friend. But why settle for a utilitarian interface when you can mold it into something that whispers of sophistication and power? Today, we're not just installing a desktop environment; we're performing an aesthetic hack, a digital makeover that blends raw power with a familiar, elegant facade. We're making Termux look like macOS.
Forget the limitations of standard command-line interfaces. This isn't about flashy looks; it's about enhancing your operational efficiency and cognitive flow. By emulating a known, intuitive GUI like macOS, you streamline your workflow, reduce cognitive load, and potentially spot anomalies faster. The goal is an immersive security analysis environment, right in your pocket. We'll be leveraging the XFCE desktop environment for this critical operation, but the principles are transferable. Think of this as your initial penetration test into a more refined mobile security setup.
Table of Contents
- The Operator's Mandate: Why Customize Termux?
- Phase 1: Establishing the Command Post (Installation)
- Phase 2: The Aesthetic Infiltration (macOS Customization)
- Phase 3: Equipping the Operative (Tools and Workflow)
- Engineer's Verdict: Is This Tactical or Trivial?
- The Operator's Arsenal
- Frequently Asked Questions
- The Contract: Your Next Move
The Operator's Mandate: Why Customize Termux?
In the realm of cybersecurity, the tools we use are extensions of our will. Termux offers a robust Linux environment on Android, a canvas for running security tools remotely or directly. However, its default appearance can be... uninspiring. For an analyst who spends hours staring into the abyss of logs and network traffic, a visually appealing and familiar interface can be more than just aesthetics; it can be a performance enhancer. Emulating macOS provides a standardized, clean, and highly functional desktop experience. This isn't about vanity; it's about building a tactical advantage by optimizing your immediate operating environment. A clean interface reduces distractions, making it easier to focus on critical security tasks, from threat hunting to bug bounty reconnaissance.
"The interface is the weapon. A clumsy interface is a blunt tool; a well-crafted one is a surgical scalpel." - Anonymous Security Architect
This process essentially involves installing a lightweight desktop environment (XFCE) and then applying themes, icons, and cursors that mimic the macOS look and feel. It’s a form of social engineering on your own device, making it more comfortable and productive. For those operating in environments where a full laptop isn’t feasible, or for quick on-the-go analyses, a customized Termux can be a game-changer. It bridges the gap between mobile convenience and desktop power.
Phase 1: Establishing the Command Post (Installation)
First, ensure you have Termux installed from a trusted source, preferably F-Droid, as the Google Play Store version is outdated. Once Termux is up and running, we need to update our package lists and upgrade existing packages to their latest versions. This is standard procedure before installing any new software to avoid conflicts and leverage the most stable code.
pkg update && pkg upgrade -yNext, we install essential components for graphical environments. This includes `proot-distro` for managing Linux distributions within Termux, and `x11-repo` which provides access to X11 server packages. We also install `termux-api` for better integration with the Android system.
pkg install proot-distro x11-repo termux-api -yNow, we need to install a Linux distribution to host our desktop environment. Ubuntu is a solid choice for its widespread compatibility and ease of use. We'll use `proot-distro` to install and set it up.
proot-distro install ubuntu
proot-distro login ubuntu
Once inside the Ubuntu distribution, we update its package lists and install the XFCE desktop environment, along with a VNC server to access the graphical session remotely.
apt update && apt upgrade -y
apt install xfce4 xfce4-goodies dbus-x11 tigervnc-standalone-server -y
After installation, we need to configure VNC. Set a password for your VNC session. This password will be used to connect to your graphical desktop.
vncserver-xmax
# You will be prompted to set a password. Choose a strong one.
You can start the VNC server with:
vncserver-xmax :1 -geometry 1280x720 -depth 24The `:1` indicates the display number, and `-geometry` sets the resolution. Choose a resolution that fits your device screen comfortably.
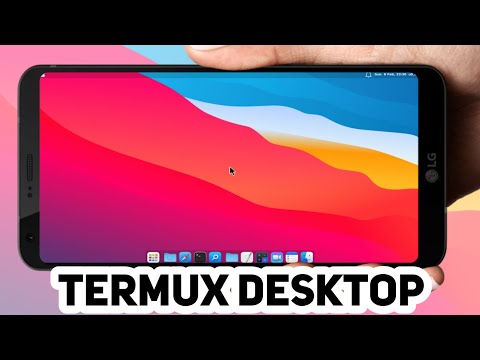
Phase 2: The Aesthetic Infiltration (macOS Customization)
With the XFCE desktop running via VNC, it's time for the cosmetic surgery. We'll download the necessary theme files, icons, cursors, and menu elements to replicate the macOS look. These elements are crucial for transforming the generic Linux desktop into a convincing macOS facade.
You can download these assets using `wget` or `curl` within Termux. Make sure you are in the appropriate directory within your Ubuntu environment (e.g., your home directory).
- Theme:
https://ift.tt/CsyY0aT - Icons:
https://ift.tt/17mGI8y - Cursors:
https://ift.tt/R6VA2ns - xApple Menu:
https://ift.tt/N2x4Y15 - Other Required Files:
https://ift.tt/E7R5k9S(credit: @Linux Scoop)
Once downloaded, you'll need to extract these archives and place the files in the correct locations within your XFCE configuration directories. This typically involves placing theme files in ~/.themes, icon themes in ~/.icons, and cursors similarly.
Navigate to your XFCE settings manager within the VNC session. You'll find options to change the Window Manager theme, Style (GTK theme), Icons, and Mouse Cursors. Carefully select the downloaded macOS-like elements for each category.
For the dock and menu bar, you might need to install additional XFCE plugins or third-party applications like Plank or Cairo-Dock, configured to mimic the macOS dock and menu structure. The `xApple-Menu` component is specifically designed to replace the default XFCE application menu with something resembling the macOS Spotlight or Launchpad. Implementing these requires attention to detail, much like crafting a sophisticated exploit.
Phase 3: Equipping the Operative (Tools and Workflow)
A visually appealing interface is useless without the right tools. Now that your Termux environment looks the part, it's time to populate it with security-focused applications. This is where the true value lies.
Within your Ubuntu Proot environment, you can install a vast array of security tools using apt.
# Example: Installing Nmap, Wireshark (tshark), and Metasploit Framework
apt install nmap wireshark tshark metasploit-framework -y
# For Python-based tools, ensure pip is installed and use it
apt install python3 python3-pip -y
pip3 install requests beautifulsoup4
Consider tools like:
- Network Scanners: Nmap, Masscan
- Vulnerability Scanners: Nikto, OpenVAS (requires significant setup)
- Web Proxies: Burp Suite (Community Edition), OWASP ZAP
- Password Cracking: John the Ripper, Hashcat (GPU support is complex on Android)
- Forensics Tools: Autopsy (requires more powerful hardware/VM)
- Exploitation Frameworks: Metasploit Framework
The key is to integrate these tools seamlessly into your customized desktop. You can create application launchers within XFCE for your most-used scripts and tools. For instance, create a launcher that starts a specific Nmap scan or initiates a VNC connection to a target.
Remember, the efficiency of your workflow directly impacts your effectiveness. A well-organized, visually intuitive environment allows for quicker analysis and reaction times, crucial in high-stakes security operations.
Engineer's Verdict: Is This Tactical or Trivial?
Transforming Termux into a macOS-like environment is a fascinating blend of functional enhancement and aesthetic engineering. While some might dismiss it as mere cosmetic change, the benefits for a security operator are tangible. Reducing the learning curve for new users, minimizing cognitive friction for experienced analysts by providing a familiar workspace, and improving overall situational awareness through a cleaner interface are significant advantages. It’s about making your tools work *for* you, not against you. However, it's crucial to remember that this is a lightweight desktop environment. For computationally intensive tasks like deep packet analysis or heavy brute-forcing, dedicated hardware or cloud-based solutions remain superior. This customization is best suited for reconnaissance, scripting, on-the-go analysis, and learning.
The Operator's Arsenal
To execute operations like the one detailed above, a seasoned operative requires a well-curated toolkit. Here are the essentials:
- Terminal Emulator: Termux (from F-Droid)
- Linux Distribution Manager:
proot-distro - Desktop Environment: XFCE
- Remote Access: Tigervnc-standalone-server
- Customization Assets: macOS themes, icon packs, cursors
- Core Security Tools: Nmap, Metasploit Framework, Burp Suite Community Edition, Wireshark/tshark, John the Ripper.
- Scripting Languages: Python 3 (with pip)
- Configuration Management: Text editors (
nano,vim), shell scripting knowledge. - Learning Resources: Security blogs, documentation, tutorials (like this one).
- Hardware: A capable Android device with sufficient storage and RAM.
For deeper dives into exploitation, consider investing in certifications like the OSCP, which offer hands-on experience with advanced techniques. The Web Application Hacker's Handbook remains a foundational text for web security specialists.
Frequently Asked Questions
Q1: Will this make my Android device run slower?
A: Running a VNC server and desktop environment does consume resources. However, XFCE is one of the lightest desktop environments available, minimizing the performance impact compared to heavier options like GNOME or KDE. Performance will vary based on your device's specifications.
Q2: Is it possible to install other desktop environments like KDE or GNOME?
A: Yes, it is technically possible, but highly discouraged due to resource constraints on most Android devices. These environments are much heavier and will likely lead to a sluggish and unstable experience.
Q3: Can I use this for actual penetration testing in the field?
A: Yes, with caution. Termux coupled with security tools can be highly effective for reconnaissance, initial access attempts, and post-exploitation tasks. However, always ensure you have explicit permission before conducting any security testing on systems you do not own or manage.
Q4: Where can I find more advanced Termux customization guides?
A: Look for communities on Reddit (r/termux), specialized forums, and YouTube channels that focus on Termux and Linux on Android. The source mentioned in the original post, @Linux Scoop, is a good starting point.
The Contract: Your Next Move
You've now seen how to transform Termux from a simple terminal into a visually sophisticated environment mirroring macOS. This isn't just about looks; it's about optimizing your operational efficiency. The next step is to operationalize this setup. Choose three of your most frequently used security tools and create custom launchers within your new XFCE environment. Document the process. What challenges did you encounter? How did the new interface affect your workflow during a simulated reconnaissance task?
Now, put your knowledge to the test. Configure your Termux XFCE desktop with the macOS theme. Install Nmap and create a launcher to scan a local network segment. Report your findings and any custom launchers you've created in the comments below. The digital battlefield is constantly evolving; adapt or become obsolete.
No comments:
Post a Comment