
The faint hum of the lab, the sterile smell of flux, and the blinking cursor on a terminal—these are the hallmarks of an investigation. Today, we're not just looking at a board; we're dissecting a potential entry point, a ghost in the machine that manufacturers often leave behind: the UART interface. While widely used in embedded systems for debugging and initial setup, its very nature as a direct communication channel makes it a prime target for attackers seeking privileged access. This isn't about *how* to exploit, but dissecting the anatomy of such an attack to understand its weaknesses and, more importantly, how to build robust defenses against it.
The Universal Asynchronous Receiver/Transmitter (UART) protocol is a cornerstone of embedded system communication. It's the silent handshake between components, the lifeline for developers to prod and poke at firmware. But in the wrong hands, it transforms from a debugging tool into a backdoor. Understanding its function, how it's exposed, and how it can be manipulated is critical for any defender operating in the intricate world of IoT and embedded security.
Table of Contents
- What is UART?
- Identifying UART Ports on Embedded Devices
- Establishing a Connection: The Attacker's First Step
- The UART Protocol Deep Dive: Data Flow and Commands
- Re-enabling Disabled UART Connectors: A Manufacturer's Oversight
- Defensive Strategies: Securing the UART Channel
- Frequently Asked Questions
- The Contract: Fortifying Your Embedded Systems
What is UART?
At its core, UART is a hardware communication protocol used for serial communication between two devices. Unlike synchronous protocols, UART doesn't rely on a shared clock signal. Instead, it uses start, stop, and parity bits to frame data packets, allowing for asynchronous transmission. This simplicity is its strength in embedded systems, where resources are often constrained. Think of it as a direct, one-to-one phone line between microcontrollers or between a microcontroller and a debugging console.
Commonly, UART interfaces consist of two main signal lines: Transmit (TX) and Receive (RX). Data is sent from the TX pin of one device to the RX pin of another, and vice-versa. Additionally, a Ground (GND) connection is essential for establishing a common reference voltage. The speed of communication, known as the baud rate (e.g., 9600 bps, 115200 bps), must be identical on both ends for successful data transfer.
In the context of embedded device hacking, a UART port often provides a direct conduit to the device's console. This console could be a bootloader prompt, a Linux shell, or a proprietary command-line interface. Gaining access to this shell is often the first step in privilege escalation, allowing an attacker to interact with the device's operating system at a low level.
Identifying UART Ports on Embedded Devices
Finding an exposed UART port is like finding an unlocked door in a fortress. Attackers meticulously scan circuit boards, looking for tell-tale signs. Defenders need to know what these signs are to eliminate them.
The most common indicators of a UART interface are:
- Pin Headers: Look for groups of pins, often unpopulated, labeled TX, RX, GND, and sometimes VCC. These are frequently found on the underside of PCBs or near the edge.
- Test Points: Small, unpopulated solder pads may serve as UART connection points.
- Connectors: Some devices might have serial port connectors, though these are less common in modern, compact designs.
- Component Markings: Older or specific chipsets might have UART pins clearly marked.
A more invasive, yet effective, method involves using a logic analyzer or an oscilloscope. By probing pins and observing signal transitions, especially during device boot-up, one can identify the characteristic patterns of UART communication. This requires a deeper understanding of signal analysis and is a technique employed by both attackers and seasoned security researchers.
Defensive Insight: Manufacturers should always remove or disable unused UART ports on production devices. If a UART is necessary for diagnostics, it should be secured behind authentication or disabled by default, requiring a specific, authenticated process to enable it.
Establishing a Connection: The Attacker's First Step
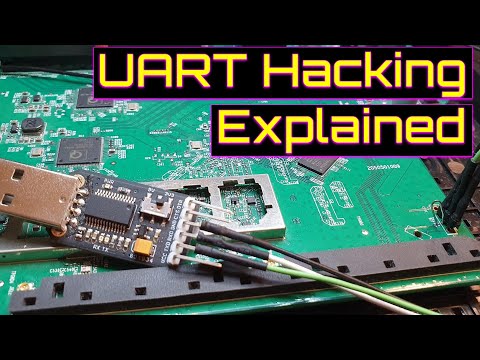
Once a potential UART interface is identified, the next step is to connect to it. This typically involves a USB-to-serial adapter, such as those based on FTDI, CP2102, or CH340 chips. These adapters translate the USB signals from a computer into the TTL (Transistor-Transistor Logic) voltage levels used by UART interfaces.
The connection process follows these steps:
- Identify Pins: Determine which pins are TX, RX, and GND. A common mistake is to cross TX and RX (connect TX to RX and RX to TX).
- Connect Adapter: Connect the GND pin of the adapter to the GND pin on the device. Then, connect the TX pin of the adapter to the RX pin of the device, and the RX pin of the adapter to the TX pin of the device.
- Select Baud Rate: This is often the trickiest part. Common baud rates include 9600, 19200, 38400, 57600, and 115200. An incorrect baud rate will result in garbled or no data.
- Open Terminal Software: Use terminal emulators like `minicom`, `screen`, `PuTTY`, or `CoolTerm` to establish the serial connection.
The goal here is to achieve clear, readable text output. Garbled text usually indicates an incorrect baud rate or a crossed TX/RX connection. A successful connection often leads directly to a privileged shell prompt.
The UART Protocol Deep Dive: Data Flow and Commands
Understanding the UART protocol isn't just about connecting wires; it's about interpreting the data stream. When an attacker gains access to a UART shell, they're essentially interacting with the device's underlying operating system or bootloader.
Key aspects of the protocol relevant to security include:
- Asynchronous Nature: Data is sent in frames, with each frame typically consisting of a start bit, data bits (usually 8), an optional parity bit, and one or more stop bits. This makes it relatively simple to implement but also prone to timing errors if not configured correctly.
- Baud Rate Mismatches: As mentioned, the baud rate must match. An attacker might try common rates, but advanced attackers might use pattern analysis on captured signals to deduce the correct rate, especially if it's non-standard.
- Command Injection: Once a shell is obtained, attackers can issue commands. This could range from simple system commands to diagnostic utilities. The impact depends entirely on the privileges of the shell and the available commands.
- Firmware Dumping: If the bootloader or OS allows, an attacker might use UART to dump the device's firmware, which can then be analyzed offline for other vulnerabilities.
Example Attack Scenario: An attacker identifies a UART port on an IoT camera. After connecting and finding the correct baud rate (e.g., 115200), they are presented with a Linux shell prompt. From here, they can list directories, examine configuration files, and potentially download sensitive credentials or firmware updates. They might also look for ways to exploit existing vulnerabilities in the running processes to gain higher privileges.
Re-enabling Disabled UART Connectors: A Manufacturer's Oversight
Manufacturers sometimes disable UART interfaces in production firmware to prevent unauthorized access. However, this can often be a temporary or circumventable measure. A common trick involves manipulating bootloader settings or exploiting vulnerabilities in the firmware itself.
One technique involves:
- Identifying Bootloader Entry Points: Many devices have specific key sequences or GPIO states that trigger the bootloader. If a UART is present, this might be a key combination transmitted via UART during boot.
- Flashing Modified Firmware or Exploiting Existing Vulnerabilities: If a UART is completely disabled and not exposed through bootloader parameters, an attacker might need to find another vulnerability (e.g., a buffer overflow in a network service) to gain code execution. Once code execution is achieved, they could potentially re-enable the UART interface by modifying firmware settings in memory or by flashing custom firmware that leaves the UART enabled.
- Hardware Manipulation: In some extreme cases, an attacker might resort to hardware modifications, such as desoldering components to access internal test points or even modifying the main processor's configuration pins if their function is accessible without desoldering.
This highlights a critical defensive point: simply disabling a port is not foolproof. It requires a comprehensive security design that doesn't rely on obscuring an interface but rather on securing it.
Defensive Strategies: Securing the UART Channel
The existence of easily accessible UART ports on production devices is a significant security risk. The following strategies are crucial for defenders:
- Remove Unused Ports: The most effective defense is to eliminate the attack surface. If a UART port is not required for intended functionality, it should be removed from the PCB or at least desoldered.
- Secure Essential Ports: If a UART is necessary for diagnostics or debugging, it must be protected. This can include:
- Authentication: Requiring a password or cryptographic token to gain shell access via UART.
- Limited Functionality: Restricting the commands available through UART to only essential diagnostic tasks, not system-level operations.
- Disable by Default: The UART interface should be disabled by default and only enabled through a secure, out-of-band mechanism or a specific configuration process.
- Physical Security: For critical systems, ensure that physical access to the device is restricted. Many UART attacks require direct physical access to the hardware.
- Firmware Hardening: During firmware development, scrutinize all code paths, especially those related to serial communication or bootloaders, for potential vulnerabilities that could be leveraged to enable or abuse UART access.
- Regular Audits: Conduct regular security audits of your embedded devices, specifically looking for exposed diagnostic interfaces like UART.
Veredicto del Ingeniero: UART is a double-edged sword. Essential for development, it’s a critical vulnerability in production. Treating it as anything less than a potential backdoor is negligence. If you *must* have it, secure it like your crown jewels.
Frequently Asked Questions
- Can UART easily be detected?
- Yes, through visual inspection of PCBs for pinouts and test points, or using tools like logic analyzers. Experienced individuals can often identify them quickly.
- What is the difference between UART and USB serial?
- USB serial adapters (like FTDI chips) convert USB signals to UART TTL signals, allowing a computer to communicate with a UART interface. They are intermediaries, not the same protocol.
- Is it possible to brute-force the UART baud rate?
- While not a direct brute-force of a password, an attacker can systematically try common baud rates. More advanced methods involve analyzing signal timing with tools like Wireshark or a logic analyzer to auto-detect the baud rate.
- How can I protect my embedded device from UART attacks?
- Remove unused UART ports, secure essential ports with authentication, implement physical security, and harden firmware. Consider disabling UART entirely for production devices.
The Contract: Fortifying Your Embedded Systems
The ability to gain a root shell via UART is a testament to how easily accessible low-level interfaces can become gaping security holes. The next time you encounter an embedded device, don't just see the ports; see the potential threats they represent. Your contract is to move beyond mere functionality and ensure the integrity and confidentiality of the systems you design and deploy. This means actively seeking out and mitigating such direct access channels. Are you building robust defenses or leaving backdoors open for the next investigator?
Now it's your turn. What are the most creative ways you've seen UART interfaces secured, or conversely, exploited? Share your insights, real-world scenarios, or defensive code snippets in the comments below. Let's build a deeper understanding together.
Arsenal of the Analyst
Equipping yourself for embedded device analysis requires specialized tools and knowledge. Here's a starter kit:
- Hardware:
- USB to TTL Serial Adapters (FTDI, CP2102, CH340)
- Logic Analyzer (e.g., Saleae Logic, DSLogic)
- Oscilloscope
- Multimeter
- Jumper Wires and Breakout Boards
- Software:
- Terminal Emulators:
minicom,screen,PuTTY,CoolTerm - Firmware Analysis Tools:
binwalk, Ghidra, IDA Pro - Packet Analyzers: Wireshark (for USB serial data if applicable)
- Terminal Emulators:
- Knowledge & Training:
- Embedded Device Hacking Courses (e.g., from Flashback, Pentester Academy, Black Hat)
- Books like "Hardware Hacking: Have Fun While Voiding Your Warranty"
- Deep understanding of microcontroller architectures and communication protocols.
Disclaimer: The techniques and information discussed in this post are for educational and defensive purposes only. All activities should be conducted ethically and with explicit authorization on systems you own or have permission to test. Unauthorized access to systems is illegal and unethical.