The digital shadows whisper tales of neglected web servers, their vulnerabilities ripe for the picking. But before the exploitation begins, there's a ritual, a necessary reconnaissance. Today, we delve into UniScan, not as a weapon, but as a diagnostic tool in the blue team's arsenal, a way to understand the enemy's first steps by observing our own. This isn't about a hasty scan; it's about understanding how a scanner dissects a target, so we can better fortify our digital citadels.
In the high-stakes game of cybersecurity, knowledge is the ultimate currency. Before any defensive strategy can be forged, one must understand the attacker's methodology. UniScan, a command-line web vulnerability scanner, presents an interesting case study. While often used for quick-fire assessments, its true value lies in its ability to reveal common misconfigurations and potential entry points that attackers actively exploit. For the defender, understanding UniScan’s output is akin to intercepting enemy reconnaissance – it highlights what attackers are looking for. This isn't about finding zero-days; it's about plugging the obvious leaks before they're discovered by more sophisticated means.
Understanding the Scan Engine: UniScan's Core Functionality
UniScan operates by sending a series of HTTP requests to a target web server and analyzing the responses. Its primary functions revolve around identifying:
Server Information: It attempts to fingerprint the web server software (e.g., Apache, Nginx) and its version. This is critical intelligence for defenders, as older versions often harbor well-documented vulnerabilities.
Directory and File Discovery: UniScan probes for common directories and files that are frequently left exposed, such as configuration files, backup archives, or administrative interfaces.
Vulnerability Checks: It includes checks for a range of common web vulnerabilities, including SQL injection (basic checks), cross-site scripting (XSS), and directory traversal.
CMS Detection: For popular Content Management Systems (CMS) like WordPress or Joomla, UniScan can often identify their presence, guiding further, more targeted analysis.
The tool’s strength lies in its simplicity and speed for broad sweeps. However, this necessitates a careful approach to interpretation, as raw output can be noisy.
When employing UniScan in a legitimate security assessment or for defensive analysis, ethical considerations are paramount. The goal is insight, not intrusion.
Obtain Explicit Authorization: Never scan a system you do not own or have explicit, written permission to test. Unauthorized scanning is illegal and unethical.
Understand Scope Limitations: Define the exact scope of your scan. Are you testing a single IP, a range, or a specific web application? Adhering to the scope prevents accidental engagement with unauthorized targets.
Configure Scan Intensity: UniScan offers various options to control the scan's agressiveness. For defensive analysis on your own infrastructure, start with less intrusive settings to minimize impact. Use flags like `-q` (quiet) to reduce verbosity and `-e` to exclude certain file types if needed.
Target Specific Vulnerabilities: Instead of a broad scan, consider targeting specific weaknesses you are concerned about. For example, using UniScan to check for common administrative login pages or known vulnerable file paths.
Review Logs Regularly: If running UniScan on your own network as a proactive measure, ensure you have robust logging in place to monitor its activity and any potential disruptions it might cause.
For demonstration and educational purposes, UniScan can be run against a local test environment, such as a vulnerable-by-design web application like DVWA (Damn Vulnerable Web Application) or OWASP Juice Shop.
Interpreting the Intel: What UniScan Reveals
The real value for a defender comes from dissecting UniScan's output. Treat each finding as a clue:
Server Headers (e.g., `Server: Apache/2.4.41 (Ubuntu)`): This tells you the web server and its version. A quick search on CVE databases (like NVD or Mitre) for "Apache 2.4.41 vulnerabilities" can reveal potential risks. If you're running this version and it's exposed, it's time to update or implement compensating controls.
Found Files/Directories (e.g., `/phpinfo.php`, `/admin/`, `/backup.zip`): These are immediate red flags. `phpinfo.php` can leak sensitive system configuration details. An exposed `/admin/` directory might lead to a brute-force attack. Backup files can contain sensitive data, credentials, or even source code.
Vulnerability Flags (e.g., `SQL Injection Found`, `XSS Found`): While UniScan's detection might be basic, these flags warrant immediate, in-depth investigation using more sophisticated tools and manual analysis. Don't assume it's a false positive without rigorous validation.
The key is to contextualize these findings within your own environment. If UniScan identifies a vulnerability, the next step is to confirm it with manual testing and then to implement the appropriate patch, configuration change, or access control.
"The best defense is a good offense... of understanding." – cha0smagick
Arsenal of the Operator/Analyst
To effectively leverage tools like UniScan and translate their findings into robust defenses, a well-equipped analyst needs a curated set of resources:
Core Scanning Tools:
Nmap: For initial network discovery and port scanning.
Nikto: Another powerful web server scanner with a vast database of known vulnerabilities.
DirBuster/Gobuster: For brute-forcing directories and files.
Vulnerability Analysis & Exploitation Suites:
Burp Suite Professional: The industry standard for web application security testing, offering advanced scanning, interception, and analysis capabilities. Essential for serious bug bounty hunters and pentesting professionals.
OWASP ZAP: A free and open-source alternative to Burp Suite, packed with features for automated scanning and manual testing.
Defensive & Forensic Tools:
Wireshark: For deep packet inspection to understand network traffic in detail.
Sysinternals Suite: A collection of essential Windows utilities for system analysis and troubleshooting.
ELK Stack (Elasticsearch, Logstash, Kibana): For centralized logging and advanced log analysis to detect suspicious activity.
Essential Reading:
"The Web Application Hacker's Handbook: Finding and Exploiting Dynamic Web Applications" by Dafydd Stuttard and Marcus Pinto.
CISSP (Certified Information Systems Security Professional): For a broader understanding of information security management.
CompTIA Security+: A foundational certification for cybersecurity professionals.
Investing in these tools and knowledge is not an expense; it's an investment in resilience. For those looking to master these skills, understanding the pricing and course structures for certifications like the OSCP is crucial for career progression. Exploring platforms like HackerOne or Bugcrowd to understand bug bounty program scopes and rewards can also provide valuable context.
Frequently Asked Questions
Is UniScan still relevant in 2024? UniScan remains relevant for quick reconnaissance and identifying common misconfigurations, especially in older or less maintained systems. However, for comprehensive security testing, it should be used in conjunction with more advanced tools.
Can UniScan detect all web vulnerabilities? No, UniScan's detection capabilities are limited to a subset of common vulnerabilities. It is not designed to find complex, logic-based flaws or sophisticated zero-day exploits.
What's the difference between UniScan and Nmap? Nmap is primarily a network scanner focused on discovering hosts, open ports, and services. UniScan is a web application scanner that targets vulnerabilities and information specific to HTTP/HTTPS protocols.
The Contract: Hardening Your Apache Server
UniScan reported `Apache/2.4.41 (Ubuntu)` on our hypothetical target. This version has known vulnerabilities. Your contract, should you choose to accept it, is this:
Research CVEs: Identify specific CVEs associated with Apache 2.4.41.
Check Internal Version: If you run Apache, verify your current version and compare it against known vulnerable versions.
Update Apache: If vulnerable, plan and execute an update to the latest stable version.
Configure Apache Security Modules: Implement mod_security or similar Web Application Firewalls (WAFs) to add an extra layer of protection against common attacks.
Harden Configuration: Review and tighten your Apache configuration file (`httpd.conf` or virtual host files) to disable unnecessary modules, restrict access, and set appropriate security headers.
Failing to act on such intelligence is like leaving the front door wide open. The digital night is long, and careless defenders are the first to fall.
```json
{
"@context": "https://schema.org",
"@type": "BreadcrumbList",
"itemListElement": [
{
"@type": "ListItem",
"position": 1,
"name": "Sectemple",
"item": "https://sectemple.com/"
},
{
"@type": "ListItem",
"position": 2,
"name": "The Lowdown on UniScan: Anatomy of a Web App Recon Tool"
}
]
}
The digital ether hums with whispers of remote connections, a constant ballet of control and access. In this dark theatre of systems, OpenSSH stands as a towering monument, the ubiquitous conductor of Linux management. For those navigating the treacherous landscapes of DevOps, Cloud infrastructure, System Administration, and Hosting, mastering OpenSSH isn't an option – it's a prerequisite for survival. This isn't about casual tinkering; it's about understanding the very arteries through which your digital empire breathes. Today, we dissect this essential tool, transforming you from a novice into a disciplined operator.
We’ll dive deep into the core mechanics: differentiating the client from its server counterpart, forging connections, deciphering configuration files, and harnessing the power of cryptographic keys. This is your primer, your operational manual for secure, efficient remote access.
At its heart, OpenSSH (Open Secure Shell) is a suite of programs that provide a secure way to access a remote computer. Think of it as a hardened tunnel through the insecure wilds of the internet. It encrypts your traffic, preventing eavesdroppers from seeing what you're doing or stealing sensitive data. In the realm of Linux, it's the de facto standard for command-line administration. Whether you're deploying code, managing server fleets, or conducting threat hunting operations across distributed systems, OpenSSH is your primary conduit.
The suite comprises two main components: the ssh client and the sshd server. The client is what you run on your local machine to initiate a connection, while the server runs on the remote machine you want to access. Understanding this client-server dynamic is the foundational step.
Connecting to a Server via OpenSSH
Initiating a connection is deceptively simple, yet fraught with potential for misconfiguration. The basic syntax is:
ssh username@remote_host
Replace username with your login credentials on the remote server and remote_host with its IP address or hostname. The first time you connect to a new host, you'll be prompted to verify its authenticity. This is crucial: it involves checking the host's public fingerprint against a known, trusted value. If this fingerprint changes unexpectedly, it could signal a man-in-the-middle attack. Always verify these fingerprints through an out-of-band channel if possible.
"Trust, but verify." – A creed as old as cryptography itself. Never blindly accept a host key.
Once authenticated, you'll be presented with a command prompt on the remote system, ready for your commands. This is where the real work begins, but also where the most critical security decisions are made.
Configuring the OpenSSH Client
The client's behavior is governed by configuration files, primarily ~/.ssh/config on the client machine. This is where you can define aliases for hosts, specify default usernames, ports, and even enable advanced security features. Automating routine connections and enforcing security policies starts here.
Consider this snippet:
[client]
Host prod-webserver
    HostName 192.168.1.100
    User admin
    Port 2222
    IdentityFile ~/.ssh/prod_key
With this configuration, typing ssh prod-webserver in your terminal will automatically connect to 192.168.1.100 as user admin on port 2222, using the private key located at ~/.ssh/prod_key. This level of detail is vital for managing complex infrastructures and preventing errors that could expose your systems.
Using Public/Private Keys
Password-based authentication, while common, is a weak point. Passwords can be cracked, leaked, or brute-forced. SSH key-based authentication offers a far more robust alternative. It relies on a pair of cryptographic keys: a private key (kept secret on your client) and a public key (placed on the server).
You generate key pairs using ssh-keygen:
ssh-keygen -t rsa -b 4096
This command creates two files: id_rsa (your private key) and id_rsa.pub (your public key). The private key must NEVER be shared. The public key, however, needs to be placed in the ~/.ssh/authorized_keys file on the target server. When you attempt to connect, the server uses your public key to issue a challenge that only your corresponding private key can solve, thereby verifying your identity without ever transmitting a password.
Managing SSH Keys
As your infrastructure grows, so does the number of keys. Securely managing these keys is paramount. The ssh-agent utility is your ally here. It holds your decrypted private keys in memory, allowing you to authenticate to multiple servers without re-entering your passphrase repeatedly.
To add a key to the agent:
ssh-add ~/.ssh/your_private_key
This command prompts for your passphrase once. Subsequent SSH connections using that key will be seamless. However, remember that an agent holding unlocked keys can be a target. Always protect your client machine and use strong passphrases.
For environments requiring high security or frequent key rotation, consider using hardware security modules (HSMs) or dedicated SSH key management solutions. The goal is to minimize the exposure of your private keys.
SSH Server Configuration
The SSH server (sshd) also has its own configuration file, typically located at /etc/ssh/sshd_config. Hardening this file is a critical defensive step. Common hardening measures include:
Disabling root login: PermitRootLogin no
Disabling password authentication in favor of key-based auth: PasswordAuthentication no
Changing the default port (though this offers minimal security benefits and can break automation): Port 2222
Limiting users or groups who can connect: AllowUsers user1 user2
After modifying /etc/ssh/sshd_config, always reload or restart the SSH service for changes to take effect (e.g., sudo systemctl reload sshd).
"The easiest way to compromise a network is often through a misconfigured service. SSH is no exception."
Regularly audit your sshd_config. What was considered secure yesterday might be a glaring vulnerability today.
Troubleshooting
When connections fail, the SSH client and server logs are your battlegrounds. On the client side, use the verbose flag: ssh -v username@remote_host. This will output detailed debugging information, often pinpointing authentication failures, network issues, or configuration conflicts.
On the server, check the system logs (e.g., /var/log/auth.log or journalctl -u sshd for systemd systems) for messages from sshd. These logs will detail rejected connections, authentication attempts, and potential security policy violations.
Common issues include:
Incorrect file permissions on ~/.ssh directory and key files on the server.
Firewall rules blocking the SSH port.
SELinux or AppArmor policies preventing sshd from accessing necessary files or network sockets.
Misconfigured AllowUsers or DenyUsers directives in sshd_config.
Veredicto del Ingeniero: ¿Vale la pena dominar OpenSSH?
The answer is a resounding 'yes'. OpenSSH is not just a tool; it's the secure handshake that underpins vast swathes of the digital infrastructure. Its versatility, security, and widespread adoption make it a non-negotiable skill for any security professional, system administrator, or developer working with Linux environments. While the initial learning curve might seem steep, especially with key management and server hardening, the investment pays dividends in operational efficiency and, most importantly, in enhanced security posture. Neglecting OpenSSH is akin to leaving your digital castle gates wide open.
Advanced Tools: Wireshark (for analyzing unencrypted traffic if SSH isn't used properly), Nmap (for host discovery and port scanning), Lynis or OpenSCAP (for server hardening audits).
Key Books: "The Shellcoder's Handbook" (for understanding low-level security concepts), "Practical Cryptography" (for deeper insights into encryption).
Certifications: CompTIA Security+, Certified Ethical Hacker (CEH), OSCP (for advanced penetration testing skills that often rely on SSH).
Cloud Platforms: Linode, AWS EC2, DigitalOcean (all heavily rely on SSH for instance management).
Taller Defensivo: Fortaleciendo tu Servidor SSH
Accede a tu servidor usando SSH con privilegios de root.
Edita el archivo de configuración del servidor SSH: sudo nano /etc/ssh/sshd_config
Deshabilita el login de root: Busca la línea PermitRootLogin y cámbiala a PermitRootLogin no. Si no existe, añádela.
Deshabilita la autenticación por contraseña: Cambia PasswordAuthentication yes a PasswordAuthentication no. Asegúrate de tener al menos una clave pública SSH configurada para un usuario no root antes de hacer esto.
Cambia el puerto (Opcional pero recomendado para reducir ruido de escaneos): Busca Port 22, cámbialo a un puerto no estándar (ej: Port 2244). Asegúrate de que el nuevo puerto esté abierto en tu firewall.
Limita el acceso a usuarios específicos: Añade o modifica la línea AllowUsers con los nombres de usuario permitidos (ej: AllowUsers juan carlos maria).
Guarda el archivo (Ctrl+X, Y, Enter en nano).
Verifica la sintaxis de la configuración: sudo sshd -t. Si hay errores, corrígelos.
Recarga el servicio SSH: sudo systemctl reload sshd o sudo service ssh reload.
Prueba la conexión desde otra terminal usando el nuevo puerto y autenticación por clave: ssh -p 2244 usuario@tu_servidor_ip.
Preguntas Frecuentes
¿Es seguro cambiar el puerto por defecto de SSH?
Cambiar el puerto 22 por uno no estándar puede reducir el ruido de escaneos automatizados de bots, pero no detiene a un atacante determinado. La verdadera seguridad reside en la autenticación robusta (claves SSH) y la configuración del servidor.
¿Qué hago si pierdo mi clave privada SSH?
Si pierdes tu clave privada, no podrás acceder a los servidores donde tenías configurada la clave pública correspondiente. Deberás revocar esa clave pública en todos los servidores y generar un nuevo par de claves, distribuyendo la nueva clave pública.
¿Puedo usar OpenSSH para conectar a Windows?
Sí, las versiones modernas de Windows Server y algunas ediciones de Windows 10/11 incluyen un servidor SSH (OpenSSH Server) que puedes instalar y configurar, permitiendo conexiones desde clientes OpenSSH.
El Contrato: Asegura tu Túnel
Has explorado los recovecos de OpenSSH, desde su génesis como cliente y servidor, hasta el intrincado arte de la autenticación por clave y el endurecimiento del servidor. Ahora, el contrato es contigo mismo: debes implementar al menos dos de las medidas de seguridad discutidas en este post en uno de tus propios servidores remotos (si tienes acceso) en la próxima semana. Ya sea deshabilitando el login de root, forzando la autenticación por clave, o implementando el taller defensivo propuesto, toma acción. La teoría solo te lleva hasta la puerta; la mitigación es lo que mantiene a los intrusos fuera.
The digital realm is a shadowy alleyway, teeming with opportunists and predators. Among them, the keys to your most sensitive data – your databases – are often left carelessly guarded. phpMyAdmin, a ubiquitous tool in the MySQL ecosystem, is a prime target. Its web-based GUI, while convenient, can become a gaping vulnerability if left unhardened. Today, we’re not just looking at a tool; we’re dissecting its defenses, revealing its weak points, and reinforcing its architecture. This isn't about pretty interfaces; it's about survival in the dark. Let's talk about securing phpMyAdmin, from the ground up.
phpMyAdmin, for all its utility, is a complex application that touches the core of your data infrastructure. It’s a cross-platform, web-based interface built on PHP, designed for managing MySQL databases. While its accessibility is its strength, it's also its Achilles' heel. Attackers know this. They scan the web for default installations, weak credentials, and unpatched versions. Failing to secure it is akin to leaving your bank vault door ajar. We'll cover the essential steps to transform it from a potential liability into a hardened asset.
The default installation of phpMyAdmin is often a hacker's best friend. It's designed for ease of use out-of-the-box, not for the battlefield of the internet. Leaving it as-is exposes you to a buffet of potential attacks:
Insecure Authentication: Default credentials, or lack thereof, are common.
Unrestricted Access: Accessible from anywhere on the internet without IP restrictions.
Lack of Encryption: Data transmitted in plain text, vulnerable to eavesdropping.
Outdated Software: Relying on old versions with known exploits.
To mitigate these risks, we need to move beyond the defaults. This requires a methodical approach, treating your phpMyAdmin instance as a critical piece of infrastructure that demands constant attention. For any serious deployment, consider investing in comprehensive training courses that cover web application security and database hardening. Certifications like CompTIA Security+ or even more advanced ones like the OSCP can provide the deep understanding needed.
Authentication: The First Line of Defense
The cornerstone of any secure system is its authentication mechanism. For phpMyAdmin, this means ditching flimsy passwords and implementing robust controls.
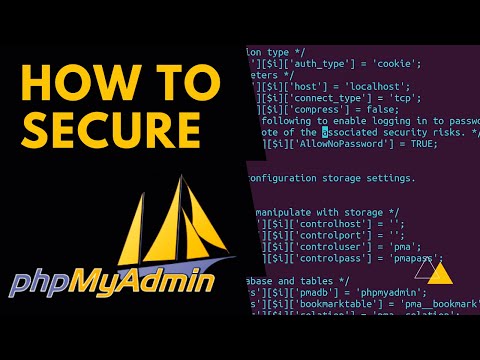
Modifying `config.inc.php`:
The primary configuration file, `config.inc.php`, is where you'll make most of these changes. If it doesn't exist, you can copy `config.sample.inc.php` and rename it.
/* Authentication type */
$cfg['Servers'][$i]['auth_type'] = 'cookie'; // Use cookie authentication
$cfg['Servers'][$i]['user'] = '';          // No default user
$cfg['Servers'][$i]['password'] = '';      // No default password
$cfg['Servers'][$i]['AllowUserSort'] = true;
$cfg['Servers'][$i]['AllowProprietaryDatabases'] = true;
Explanation:
`auth_type = 'cookie'`: This is the recommended method. It uses cookies to maintain user sessions, which is more secure than embedding credentials directly or relying solely on HTTP basic authentication, especially if your transport layer isn't perfectly secured.
`user` and `password`: Leaving these empty forces the user to log in with their specific MySQL credentials. Never embed root credentials here. Create dedicated MySQL users with the minimum necessary privileges for the tasks they need to perform.
HTTP Authentication:
Alternatively, you can use HTTP authentication provided by your web server. This adds an extra layer before the phpMyAdmin login screen even appears. You'll typically configure this within your web server's configuration files (e.g., Apache's `.htaccess` or `httpd.conf`).
# Example for Apache .htaccess
AuthType Basic
AuthName "Restricted Access"
AuthUserFile /path/to/.htpasswd
Require valid-user
Securing these credentials is paramount. For a truly hardened setup, consider integrating phpMyAdmin with a centralized authentication system like LDAP, though this is often outside the scope of a standard deployment and is typically found in enterprise-level security solutions or advanced penetration testing scenarios.
Access Control: Building Walls
Who gets to see the keys to the kingdom? You decide. Restricting access is crucial, especially if phpMyAdmin is exposed to the internet. The most effective method is IP-based access control.
Web Server Configuration (Apache Example):
<Directory /var/www/html/phpmyadmin>
    Options FollowSymLinks
    DirectoryIndex index.php

    <IfModule mod_authz_core.c>
        Require ip 192.168.1.0/24 # Allow access from your local network
        Require ip 10.10.0.0/16  # Allow access from another internal network
        # Deny from all implicitly if no 'Require' directive matches
    </IfModule>
    <IfModule !mod_authz_core.c>
        Order deny,allow
        Deny from all
        Allow from 192.168.1.0/24
        Allow from 10.10.0.0/16
    </IfModule>
</Directory>
Explanation:
The `Require ip` (Apache 2.4+) or `Allow from` (Apache 2.2) directives limit access to specific IP addresses or ranges.
Crucially, if phpMyAdmin is accessible from the public internet, you should only allow access from known, trusted IP addresses (your office, your home IP if static, or a bastion host).
This configuration ensures that only authorized IPs can even reach the phpMyAdmin login page, significantly reducing the attack surface. Remember, relying solely on a firewall is often insufficient; server-level access control provides a more granular defense.
Securing Communication and Transport
Even with strong authentication and access control, if your connection to phpMyAdmin is unencrypted, your credentials and data are transmitted in plain text. This is a classic man-in-the-middle (MITM) attack waiting to happen. The solution is straightforward: use HTTPS.
Enforcing HTTPS:
Obtain an SSL/TLS Certificate: You can get free certificates from Let's Encrypt or purchase one from a Certificate Authority (CA).
Configure Your Web Server: Set up your web server (Apache, Nginx) to use the SSL/TLS certificate.
Redirect HTTP to HTTPS: Ensure all HTTP requests to your phpMyAdmin URL are automatically redirected to the HTTPS version.
Consider using security headers like Strict-Transport-Security (HSTS) to enforce browser compliance with HTTPS. This isn't merely a suggestion; it's a fundamental requirement for any web application managing sensitive data. Tools like Qualys SSL Labs can help you assess your TLS configuration's strength.
Patching and Updates: The Eternal Vigilance
Software vulnerabilities are a constant threat. phpMyAdmin, like any software project, has had its share of security flaws discovered over the years. The most effective defense against these is to keep your installation updated.
Update Strategy:
Subscribe to Alerts: Follow phpMyAdmin's official announcements and security advisories.
Regular Checks: Periodically visit the official phpMyAdmin website to check for new releases.
Automated Updates (with caution): While tempting, fully automated updates can sometimes break functionality. A better approach is to set up notifications or use a package manager (`apt`, `yum`) that simplifies the update process.
Test Updates: Before deploying updates to a production environment, test them on a staging or development server.
Example using `apt` (Debian/Ubuntu):
sudo apt update
sudo apt upgrade phpmyadmin
Ignoring updates leaves you exposed to known exploits that automated scanners actively hunt for. For serious security professionals, understanding the vulnerability lifecycle and diligently patching is a non-negotiable aspect of their daily routine. If you're serious about this, consider exploring books like "The Web Application Hacker's Handbook" for deeper insights into exploit methodologies.
Disguising Your Fortifications
While not a primary security measure, obscurity can be a useful layer in a defense-in-depth strategy. Making your phpMyAdmin installation harder to find can deter casual attackers and automated scans.
Changing the Alias:
The default path `/phpmyadmin` is widely known. You can change this by modifying your web server's configuration.
Apache Example:
Instead of linking to `/var/www/html/phpmyadmin`, you might use an alias:
Alias /mysecretadmin /var/www/html/phpmyadmin
<Directory /var/www/html/phpmyadmin>
    # ... Access control directives as shown previously ...
</Directory>
Nginx Example:
location /mysecretadmin {
    alias /var/www/html/phpmyadmin;
    # ... Access control directives ...
}
Disabling Directory Listing:
Ensure that directory listing is disabled for your web server. This prevents attackers from browsing the contents of your directories if they somehow gain access.
Options -Indexes in Apache's `.htaccess` or `` block, or `autoindex off;` in Nginx's `location` block.
Remember, obscurity alone is not security. It should complement, not replace, strong authentication, access control, and patching. Think of it as making your front door harder to find, but still having a robust lock and a guard.
Advanced Hardening Techniques
For those operating in high-security environments or engaging in rigorous security assessments, further steps can be taken:
Two-Factor Authentication (2FA): While phpMyAdmin doesn't natively support 2FA, you can implement it at the web server level using modules like `mod_security` with custom rules or by proxying through an authentication gateway that supports 2FA.
Web Application Firewall (WAF): Deploying a WAF (like ModSecurity, Cloudflare, or AWS WAF) can filter malicious requests before they even reach phpMyAdmin, protecting against SQL injection, XSS, and other common web attacks.
Containerization: Running phpMyAdmin in a Docker container can provide isolation and simplify deployment and security management. Ensure the container image is kept updated and only exposes necessary ports.
Dedicated Host/Subdomain: Host phpMyAdmin on its own subdomain or even a dedicated server, separate from your main web applications, to limit the blast radius of a compromise.
Investing in professional penetration testing services can help identify subtle misconfigurations and vulnerabilities you might have missed. These services often uncover issues that even the most diligent internal teams overlook.
Arsenal of the Security Operator
To effectively secure and manage phpMyAdmin, a seasoned operator relies on a curated set of tools and resources:
Web Server Configuration Files: Apache (`httpd.conf`, `.htaccess`), Nginx (`nginx.conf`, site-specific configs) are your primary tools for access control and SSL enforcement.
phpMyAdmin `config.inc.php`: The central hub for phpMyAdmin's own configuration.
Online Resources: Official phpMyAdmin documentation, OWASP (Open Web Application Security Project).
"The greatest security risk is the user." - Often attributed to various security experts, emphasizing the importance of user education and credential management.
FAQ: Frequently Asked Questions
Q1: Is it safe to expose phpMyAdmin to the internet?
A: Exposing phpMyAdmin to the public internet without rigorous security measures is highly discouraged. Best practice is to restrict access by IP, use HTTPS, and employ strong authentication.
Q2: Can I use the root MySQL user for phpMyAdmin?
A: Absolutely not. Granting root privileges to phpMyAdmin is a massive security risk. Create specific MySQL users with the minimal privileges required for the tasks they will perform.
Q3: How often should I update phpMyAdmin?
A: You should update phpMyAdmin whenever a new stable version or security patch is released. Regularly checking for updates is part of maintaining a secure environment.
Q4: What is the best authentication method for phpMyAdmin?
A: Cookie authentication (`auth_type = 'cookie'`) is generally recommended for its balance of security and usability. For extremely sensitive environments, combining it with HTTP authentication and IP restrictions provides a strong defense.
Q5: How can I further secure my MySQL server itself?
A: Securing phpMyAdmin is only part of the puzzle. Ensure your MySQL server is also hardened: use strong passwords, restrict network access, disable unnecessary features, encrypt sensitive data, and keep the MySQL server software updated.
The Contract: Secure Your Interface Now
You've seen the blueprints. You understand the vectors. Leaving your phpMyAdmin installation exposed is a debt that will inevitably be collected, likely at the worst possible moment. The contract is simple: implement these security measures or face the consequences. Start with the basics – change the alias, enforce cookie authentication, and lock down access by IP. Then, layer on HTTPS and commit to a regular patching schedule. Don't wait for an alert from your SIEM or, worse, a notification about a data breach. The time to act is now. Your data’s integrity depends on your discipline.
Now, the floor is yours. Are there other hardening techniques you employ? Have you encountered particularly sophisticated attacks against phpMyAdmin? Share your knowledge, your scripts, and your war stories in the comments. Let's build a collective defense.