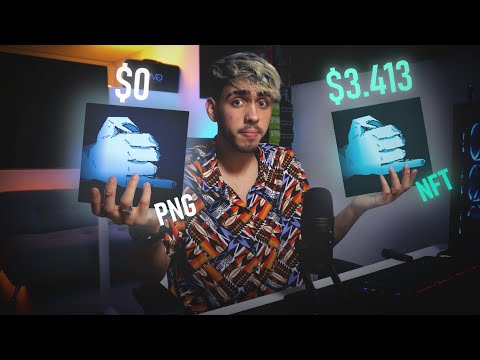
La blockchain es el nuevo salvaje oeste digital, y los NFTs son las parcelas de oro que todos quieren reclamar. Pero, ¿qué hay detrás de estos tokens no fungibles que hacen que algunos valgan millones y otros no valgan ni el gas que cuesta acuñarlos? No es magia, es código. Y hoy, vamos a desmantelar esa ilusión para construir algo real. Hoy no es solo sobre "crear un NFT", es sobre entender la arquitectura subyacente, los contratos inteligentes que lo definen, y cómo posicionarte para capturar valor en este ecosistema emergente.
Seamos claros. Cualquiera puede seguir un tutorial y generar un NFT con un par de clics. Eso es para los que buscan un souvenir digital, no para los que quieren ejercer control. Nosotros, en Sectemple, no buscamos exhibiciones. Buscamos el *know-how*, la capacidad de desplegar, auditar y, sí, explotar la mecánica detrás de estos activos digitales. Este no es un curso para principiantes que quieren una caricatura en la blockchain. Este es un análisis técnico para aquellos que entienden que la propiedad digital es tan real como la física, si sabes dónde mirar.
Te miras en el espejo y ves a un creador, a un estratega digital. Ves potencial en los píxeles y en el código. El mercado de NFTs, esa jungla de especulación y arte digital, te llama. Sabes que hay dinero, que hay una nueva forma de propiedad. Pero el camino fácil —el de usar una plataforma preconstruida— no es para ti. Quieres entender. Quieres construir. Quieres tener la llave maestra.
Crear un NFT desde cero no es solo lanzar una imagen a la red. Es desplegar un contrato inteligente, definir metadatos inmutables y entender las implicaciones de la escasez digital. Es un acto de ingeniería. Hoy, vamos a transformar esa curiosidad en capacidad. Vamos a pasar de "cómo crear un NFT" a "cómo diseñar y desplegar un contrato de NFT robusto y seguro".
Arquitectura Blockchain y NFTs: Los Cimientos
Primero, hay que entender la arena. La blockchain es un libro de contabilidad distribuido, inmutable y transparente. Cada transacción, cada transferencia de propiedad, queda registrada para siempre. Los NFTs son tokens únicos, no intercambiables, que representan la propiedad de un activo digital (o a veces físico). A diferencia de las criptomonedas como Bitcoin o Ether, donde cada unidad es idéntica a la otra (fungible), cada NFT es distinto.
Piensa en un coleccionable físico: un cromo raro de un partido de béisbol. Solo hay uno de ese cromo específico, con esa firma y ese número de serie. Un NFT es el equivalente digital de esa rareza. Los metadatos asociados al NFT (la descripción, el enlace al activo digital, propiedades únicas) son lo que le da su valor e identidad. Estos metadatos suelen almacenarse fuera de la cadena (en sistemas como IPFS o servidores web) para mantener bajos los costos de transacción, pero el enlace a ellos se registra de forma inmutable en la blockchain.
Contratos Inteligentes en Ethereum con Solidity: Tu Lienzo Digital
Si quieres construir tu propio NFT, necesitas un lenguaje para hablar con la blockchain. En el ecosistema de Ethereum, el lenguaje predominante es Solidity. Es un lenguaje de programación orientado a objetos, diseñado para escribir contratos inteligentes. Estos contratos son programas que se ejecutan en la blockchain y que definen las reglas de tu NFT.
Un contrato inteligente para NFTs debe manejar:
La propiedad de cada token (qué dirección posee qué token).
La acuñación (creación) de nuevos tokens.
La transferencia de tokens entre direcciones.
La consulta de metadatos asociados a cada token.
La seguridad en Solidity es primordial. Un error en tu contrato puede llevar a la pérdida de activos o a vulnerabilidades que actores maliciosos pueden explotar. Por eso, auditar tu código antes de desplegarlo en una red principal es fundamental.
El Estándar ERC-721: La Plantilla Universal
No reinventamos la rueda. Los desarrolladores de Ethereum han creado varios estándares para facilitar la interoperabilidad. El estándar más común para NFTs es ERC-721. Un contrato que cumple con ERC-721 expone un conjunto de funciones estándar que permiten a las billeteras y a los mercados interactuar con tus NFTs de manera predecible.
Las funciones clave de ERC-721 incluyen:
`balanceOf(address _owner)`: Devuelve la cantidad de tokens que posee una dirección.
`ownerOf(uint256 _tokenId)`: Devuelve la dirección del propietario de un token específico.
`transferFrom(address _from, address _to, uint256 _tokenId)`: Transfiere un token de una dirección a otra.
`approve(address _spender, uint256 _tokenId)`: Permite a otra dirección gastar un token en tu nombre.
`tokenURI(uint256 _tokenId)`: Devuelve la URI de metadatos del token, que apunta a la información del NFT.
Implementar ERC-721 te asegura que tu NFT será compatible con la mayoría de las plataformas y billeteras existentes. Aquí es donde la experiencia de un ingeniero de seguridad se vuelve invaluable: asegurar que la implementación sea correcta y no introduzca debilidades.
Taller Práctico: Tu Primer NFT en la Red de Pruebas
Antes de arriesgarte con Ether real, debemos desplegar en una red de pruebas como Sepolia o Goerli. Necesitarás una billetera como MetaMask y algunos Gwei de prueba de un *faucet* (grifo) de red de pruebas.
Aquí tienes un ejemplo simplificado de un contrato ERC-721 en Solidity.
// SPDX-License-Identifier: MIT
pragma solidity ^0.8.0;

import "@openzeppelin/contracts/token/ERC721/ERC721.sol";
import "@openzeppelin/contracts/utils/Counters.sol";
import "@openzeppelin/contracts/access/Ownable.sol";

contract MiPrimerNFT is ERC721, Ownable {
    using Counters for Counters.Counter;
    Counters.Counter private _tokenIdCounter;

    // URI base para los metadatos. Ejemplo: "ipfs://QmWZ..."
    string public baseURI;

    constructor(string memory _baseURI) ERC721("MiNFT", "MNFT") {
        baseURI = _baseURI;
    }

    // Función para acuñar (mint) un nuevo NFT. Solo el propietario puede llamar a esta función.
    function safeMint(address to) public onlyOwner {
        uint256 tokenId = _tokenIdCounter.current();
        _tokenIdCounter.increment();
        _safeMint(to, tokenId);
    }

    // Sobreescribimos tokenURI para que use la baseURI y el ID del token
    function _baseURI() internal view override returns (string memory) {
        return baseURI;
    }

    function tokenURI(uint256 tokenId) public view override returns (string memory) {
        require(_exists(tokenId), "ERC721Metadata: URI query for nonexistent token");
        string memory _baseURI = _baseURI();
        string memory json = "{"; // Inicia la cadena JSON base
        json = string(abi.encodePacked(json, "\"name\": \"MiNFT #", uint2str(tokenId), "\", "));
        json = string(abi.encodePacked(json, "\"description\": \"Este es mi NFT único, creado desde cero.\", "));
        json = string(abi.encodePacked(json, "\"image\": \"", _baseURI, uint2str(tokenId), ".png\"")); // Asume que las imágenes están en formato baseURI/id.png
        json = string(abi.encodePacked(json, "}"));
        return string(abi.encodePacked("data:application/json;base64,", base64.encode(bytes(json))));
    }

     // Función auxiliar para convertir uint a string
    function uint2str(uint _i) internal pure returns (string memory _uintAsString) {
        if (_i == 0) return "0";
        uint j = _i;
        uint len = 0;
        while (j != 0) {
            len++;
            j /= 10;
        }
        bytes memory bstr = new bytes(len);
        uint k = len;
        j = _i;
        while (j != 0) {
            bstr[--k] = bytes1(uint8(j % 10) + 48);
            j /= 10;
        }
        return string(bstr);
    }
}
**Pasos para desplegarlo:**
Configura tu entorno de desarrollo: Usa Remix IDE (un IDE online para Solidity) o configura un entorno local con Truffle/Hardhat.
Copia el código: Pega el código del contrato en tu IDE. Asegúrate de tener las librerías OpenZeppelin disponibles (Remix las maneja automáticamente).
Compila el contrato: Selecciona la versión correcta del compilador de Solidity y compila.
Despliega en la red de pruebas: Configura MetaMask para usar una red de pruebas (ej. Sepolia). Obtén Gwei de prueba de un *faucet*. En Remix, selecciona "Injected Web3" y tu cuenta de MetaMask. Introduce el `baseURI` (puede ser una IPFS CID o una URL base) y haz clic en "Deploy". Recuerda que `baseURI` es un constructor, así que lo defines al desplegar.
Acuña un token: Una vez desplegado, interactúa con las funciones del contrato. Llama a `safeMint` y proporciona la dirección de tu billetera. Esto creará tu primer NFT.
Verifica en un explorador de bloques: Usa Etherscan (o el explorador de Sepolia) para ver tu contrato desplegado y tus tokens acuñados.
Auditoría de Seguridad: Cerrando Brechas Antes de Que Te Cuesten Oro
Desplegar un contrato no auditado en una red principal es como lanzar tu dinero a un pozo sin fondo. Las vulnerabilidades comunes en contratos NFT incluyen:
Reentrancy attacks: Si tu contrato interactúa con otros contratos que manejan Ether.
Integer Overflow/Underflow: Problemas con operaciones matemáticas en tipos de datos numéricos.
Falta de comprobaciones en transferencias: No verificar si el remitente tiene fondos suficientes.
Metadatos maliciosos: Si los metadatos se alojan en un servidor centralizado y este es comprometido, el enlace al activo digital puede ser modificado, devaluando o arruinando el NFT.
Vulnerabilidades en el patrón `Ownable`: Si la clave privada del propietario es comprometida, el atacante puede acuñar tokens ilimitados o robar los existentes.
Para una auditoría seria, necesitas herramientas como Slither, Mythril, o incluso contratar a empresas especializadas. No escatimes en esto. La seguridad de tu contrato y de la propiedad de tus usuarios es tu reputación.
Impacto en el Mercado y Estrategia de Posicionamiento
El mercado de NFTs fluctúa salvajemente. La estrategia de "crear y vender" sin un plan es una receta para el fracaso. Piensa en el valor que ofreces: ¿Es arte digital único, utilidades exclusivas (acceso a comunidades, eventos, juegos), o una combinación?
Si buscas vender tus NFTs, considera:
Marketing y Comunidad: Construye una comunidad fuerte en plataformas como Discord y Twitter. Comparte el proceso, interactúa con tus seguidores.
Utilidad Real: Un NFT con utilidad tiene más probabilidades de mantener su valor. ¿Qué obtienen los poseedores más allá del token en sí?
Estética y Narrativa: Un buen arte y una historia convincente conectan emocionalmente con los coleccionistas.
Distribución: Considera si lanzarás todos los NFTs de golpe o de forma escalonada.
La clave no está solo en la técnica, sino en la aplicación estratégica y la creación de demanda.
Arsenal del Operador/Analista
Para moverte en este espacio con autoridad, necesitas las herramientas adecuadas:
IDEs de Desarrollo: Remix IDE para prototipos rápidos, o Truffle/Hardhat para proyectos más complejos.
Billeteras Web3: MetaMask es el estándar de facto. Para transacciones de alto valor, considera billeteras de hardware.
Exploradores de Bloques: Etherscan (para Mainnet), Sepolia.etherscan.io (para Sepolia), etc. Indispensables para rastrear transacciones y auditar contratos.
Herramientas de Análisis On-Chain: Dune Analytics, Nansen. Te permiten entender el comportamiento del mercado y de los coleccionistas.
Servicios de Almacenamiento Descentralizado: IPFS para alojar metadatos de forma inmutable.
Libros Clave: "Mastering Ethereum" de Andreas M. Antonopoulos, la documentación oficial de Solidity y OpenZeppelin.
Certificaciones: Si bien no hay certificaciones estándar de "auditor de contratos inteligentes", la experiencia demostrada en Solidity y la seguridad blockchain es lo que valida.
Para la inversión y análisis de mercado, plataformas como TradingView y herramientas específicas de análisis on-chain son vitales si buscas posicionarte no solo como creador, sino como inversor o analista en este espacio.
Preguntas Frecuentes
¿Es necesario saber programar para crear un NFT?
Para crear un NFT *desde cero* y tener control total, sí, necesitas saber programar en lenguajes como Solidity. Sin embargo, existen plataformas que permiten crear y acuñar NFTs sin escribir código, aunque con funcionalidades limitadas y dependientes de terceros.
¿Cuánto cuesta desplegar un contrato NFT en Ethereum?
El costo (conocido como "gas") varía enormemente dependiendo de la complejidad del contrato, la congestión de la red y el precio actual de Ether. Desplegar un contrato ERC-721 básico puede costar desde unas pocas decenas hasta varios cientos de dólares en la red principal. Las redes de prueba son gratuitas.
¿Qué es más importante: el arte o el contrato?
Ambos son cruciales. Un contrato bien escrito y seguro es la base de la propiedad y la confianza. El arte o el activo digital es lo que genera interés y valor percibido. Un NFT sin un contrato sólido es frágil; un contrato sin un activo digital atractivo tendrá poca demanda.
¿Cómo protejo mis metadatos si los almaceno en IPFS?
IPFS es resistente a la censura pero no a la pérdida de datos si no se "pinea" correctamente. Utiliza servicios de *pinning* (como Pinata o Infura) para asegurar que tus metadatos permanezcan disponibles. Además, considera almacenar una copia en un servicio de almacenamiento descentralizado alternativo o en un servidor web asegurado si el contenido es crítico.
El Contrato: Tu Despliegue Estratégico
Has visto la arquitectura, has escrito el código y entiendes los riesgos. Ahora, el desafío es tuyo. Toma este contrato de ejemplo, modifícalo. Añádele características únicas. Implementa mecánicas de acuñación más complejas: fases de preventa, listas blancas, acuñación aleatoria de atributos.
Pero el verdadero golpe de maestría no es solo desplegarlo. Es desplegar con una estrategia de monetización clara. ¿Serás tú quien venda los NFTs directamente? ¿Crearás un mercado secundario que genere regalías en cada transferencia? **Tu objetivo final es pasar de ser un simple creador a un arquitecto de ecosistemas digitales.**
Ahora es tu turno. ¿Qué características únicas añadirías a este contrato ERC-721 para hacerlo destacar? ¿Cómo planeas monetizar tu despliegue más allá de la venta inicial? Demuéstralo con tu código o tu plan de estrategia en los comentarios.
The digital ether is a graveyard of forgotten projects. Millions of NFTs, launched with fanfare, now languish in obscurity, digital dust in the blockchain wind. Creating an NFT collection isn't just about minting digital art; it's about architecting a decentralized asset, a smart contract that lives eternally on the ledger. This isn't for the faint of heart, nor for those who treat coding as a mystical art. This is for the engineers, the builders, the ones who understand that true digital ownership is programmable. Today, we dissect the anatomy of a generative NFT collection and build one from the ground up.
We’re not just uploading JPEGs. We’re deploying immutable logic. This isn't another "fun little project" post. This is about forging your own digital legacy, one line of Solidity at a time. Forget the hype; understand the code.
This ultimate guide will equip you with the knowledge to upload an entire NFT collection onto the Ethereum or Polygon network. We’ll go beyond the superficial and dive into the technical underpinnings required for a robust and scalable deployment. So, roll up your sleeves, because we’re about to architect.
Understanding the Core Components
Before we write a single line of code, let’s map out the battlefield. A generative NFT collection comprises several critical pieces:
Generative Art: The visual assets that will form the basis of your NFTs. These are often composed of layers and traits that are randomly combined to create unique pieces.
Metadata: The descriptive data associated with each NFT. This includes properties, attributes, name, and crucially, a link to the actual asset.
Smart Contract: The backbone. This is the code deployed on the blockchain that governs the ownership, transferability, and rules of your NFTs. It will typically implement the ERC-721 standard.
Deployment Infrastructure: Tools and services needed to generate art, manage metadata, and deploy the smart contract.
Each of these components requires a systematic approach. Neglect any one, and your collection risks becoming another ghost in the machine.
Generative Art and Metadata Pipelines
The magic of generative art lies in its systematic randomness. You define layers (e.g., background, body, eyes, mouth, accessories) and then programmatically combine them to produce a finite, yet unique, set of outputs. Think of it like a digital deck of cards, where each trait has a different rarity, influencing the overall uniqueness of the final NFT.
The Process:
Asset Creation: Design each trait as a transparent PNG image. Consistency in dimensions and alignment is paramount.
Trait Definition: Map out all possible traits and their rarities. This data will be crucial for generating the metadata.
Generation Script: Write a script (often in Python or JavaScript) that iterates through your traits, randomly selecting combinations based on rarity. This script will output:
The final layered images.
The corresponding metadata JSON files. Each JSON file should adhere to the NFT metadata standard, including fields like name, description, image (a pointer to the asset, often an IPFS hash or a direct URL), and attributes.
Example Metadata Structure (JSON):
{
  "name": "Nerdy Coder Clone #1",
  "description": "A unique digital collectible created by the HashLips community.",
  "image": "ipfs://Qm.../1.png",
  "attributes": [
    {
      "trait_type": "Background",
      "value": "Blue"
    },
    {
      "trait_type": "Body",
      "value": "Green"
    },
    {
      "trait_type": "Eyes",
      "value": "Happy"
    },
    {
      "trait_type": "Accessory",
      "value": "Hacker Hat"
    }
  ]
}
The key here is reproducibility and uniqueness. Your generation script must be able to produce the exact same set of NFTs and metadata if run again, and each NFT must have a distinct identifier and token URI pointing to its unique metadata.
For those serious about production-level generative art, investing in robust scripting and version control for your assets and metadata is non-negotiable. Tools like IpfsTools or custom Python scripts are indispensable.
Smart Contract Development with Solidity
Solidity is the language of choice for Ethereum Virtual Machine (EVM) compatible blockchains like Ethereum and Polygon. Your smart contract will define the rules of your NFT universe.
Core ERC-721 Implementation:
The ERC-721 standard is the fundamental interface for non-fungible tokens. Your contract will need to implement its core functions, including:
balanceOf(address owner): Returns the number of NFTs owned by an address.
ownerOf(uint256 tokenId): Returns the owner of a specific NFT.
safeTransferFrom(...): Transfers an NFT from one owner to another.
approve(...) and getApproved(...): For granting permission to others to transfer an NFT.
tokenURI(uint256 tokenId): This is critical! It returns a URI pointing to the metadata associated with a specific NFT.
Essential Features for a Collection Contract:
Minting Functionality: A function to create new NFTs. This could be a simple `mint` function for the contract owner or a more complex mechanism involving public sales, allowlists, and gas optimizations.
Metadata URI Management: A way to set the base URI for your metadata. Often, the `tokenURI` function concatenates this base URI with the `tokenId`.
Supply Cap: Limiting the total number of NFTs that can be minted.
Owner/Admin Controls: Functions for the contract deployer to manage the sale, pause minting, or withdraw funds.
Reveal Mechanism (Optional): If you want to prevent bots from minting early or to align with a marketing strategy, you might implement a mechanism where metadata is only revealed after a certain condition is met.
When developing your smart contract, using established libraries like OpenZeppelin's ERC721 implementation is highly recommended. It’s battle-tested, secure, and saves you from reinventing the wheel. Exploring their `Ownable` and `MerkleProof` contracts is also crucial for building secure access controls and whitelisting mechanisms.
"Security is not a feature, it's a fundamental requirement. Especially when dealing with immutable code on a public ledger."
A common mistake is to hardcode metadata URIs directly into the contract. Instead, use a base URI and append the token ID. This is far more efficient and scalable. For storing your assets and metadata, IPFS (InterPlanetary File System) is the de facto standard. Pinning services like Pinata or Fleek ensure your data remains accessible on the decentralized web.
Deployment Strategies: Ethereum vs. Polygon
The choice between Ethereum and Polygon (or other EVM-compatible chains) hinges on several factors, primarily gas fees and transaction speed.
Ethereum Mainnet: The most secure and decentralized network, but also the most expensive. Gas fees can fluctuate wildly, making large-scale minting cost-prohibitive during peak times. It offers the highest level of prestige and security.
Polygon (Matic): A Layer-2 scaling solution for Ethereum. It offers significantly lower gas fees and faster transaction times, making it ideal for generative collections with large supplies or for projects targeting a wider audience who might be sensitive to high gas costs. Polygon is EVM-compatible, meaning your Solidity contracts can often be deployed with minimal changes.
Deployment Steps:
Setup Development Environment: Use tools like Hardhat or Truffle. These frameworks streamline contract compilation, testing, and deployment.
Write and Test Your Contract: Thoroughly test your contract on a local testnet (e.g., Ganache, Hardhat Network) and then on a public testnet (e.g., Sepolia for Ethereum, Mumbai for Polygon).
Compile Your Contract: Use your chosen framework to compile the Solidity code into bytecode.
Obtain Network Funds: For testnets, use faucets. For mainnets, you'll need ETH (Ethereum) or MATIC (Polygon).
Deploy: Use your framework's deployment scripts to send the contract bytecode to the chosen network. This transaction will incur gas fees.
Verify Your Contract: Once deployed, verify your contract's source code on block explorers like Etherscan (for Ethereum) or Polygonscan (for Polygon). This builds trust and transparency with your community.
For cost-conscious deployments, Polygon is often the pragmatic choice. However, if your project is targeting high-end collectors or requires maximum security and decentralization, Ethereum Mainnet remains the gold standard. Consider offering deployment on both chains if your audience is diverse.
Arsenal of the Operator/Analyst
To navigate the complexities of NFT collection deployment, you'll need a curated set of tools:
Development Frameworks:Hardhat and Truffle are essential for compiling, testing, and deploying smart contracts.
Code Editor:VS Code with Solidity extensions provides a smooth development experience.
IPFS Tools:Pinata or Fleek for pinning your NFT assets and metadata.
Blockchain Explorers:Etherscan (Ethereum) and Polygonscan (Polygon) for contract verification and transaction monitoring.
Wallet:MetaMask is the standard browser extension wallet for interacting with EVM chains.
Generative Art Libraries: Depending on your chosen language, libraries like p5.js (JavaScript) or custom Python scripts with PIL/Pillow are commonly used.
NFT Project Management: Platforms like OpenSea or Rarible for listing and showcasing your collection post-deployment.
Mastering these tools is akin to a seasoned hacker acquiring their preferred exploits. They are the extensions of your will in the digital realm.
Practical Implementation: Deploying Your Collection
Let's walk through a simplified deployment process using Hardhat on the Polygon Mumbai testnet. Assume you have your generative art and metadata already generated and uploaded to IPFS, with a valid base URI.
Step 1: Project Setup with Hardhat
If you don't have a Hardhat project, create one:
mkdir my-nft-project
cd my-nft-project
npm init -y
npm install --save-dev hardhat @nomicfoundation/hardhat-toolbox
npx hardhat
# Select "Create a JavaScript project" and then a default sample project.
Step 2: Write Your ERC721 Contract
Install OpenZeppelin contracts:
npm install @openzeppelin/contracts
Create a contract file (e.g., `contracts/MyToken.sol`):
// SPDX-License-Identifier: MIT
pragma solidity ^0.8.9;

import "@openzeppelin/contracts/token/ERC721/ERC721.sol";
import "@openzeppelin/contracts/token/ERC721/extensions/ERC721URIStorage.sol";
import "@openzeppelin/contracts/access/Ownable.sol";

contract MyToken is ERC721, ERC721URIStorage, Ownable {
    string private _baseTokenURI;
    uint256 public maxSupply;

    constructor(string memory baseURI, uint256 _maxSupply) ERC721("MyToken", "MTK") {
        _baseTokenURI = baseURI;
        maxSupply = _maxSupply;
    }

    function safeMint(address to, uint256 tokenId) public onlyOwner {
        require(totalSupply() < maxSupply, "Max supply reached");
        _safeMint(to, tokenId);
    }

    function _baseURI() internal view override returns (string memory) {
        return _baseURI;
    }

    function tokenURI(uint256 tokenId) public view override returns (string memory) {
        string memory base = _baseURI();
        return bytes(base).length > 0 ? string(abi.encodePacked(base, Strings.toString(tokenId), ".json")) : "";
    }

    // Keep the following function for ERC721URIStorage compatibility (if needed later)
    function _setTokenURI(uint256 tokenId, string memory _tokenURI) internal virtual {
        _tokenURIs[tokenId] = _tokenURI;
    }

    function _burn(uint256 tokenId) internal override(ERC721, ERC721URIStorage) {
        super._burn(tokenId);
    }

    function supportsInterface(bytes4 interfaceId) public view override(ERC721, ERC721URIStorage) returns (bool) {
        return super.supportsInterface(interfaceId);
    }
}
npx hardhat run scripts/deploy.js --network mumbai
After successful deployment, navigate to Polygonscan, find your contract address, and use the "Verify and Publish" feature. You'll need to input the exact contract code and settings used for deployment.
"Verification is not just for show; it's a trust mechanism. In the decentralized world, transparency is the loudest statement you can make."
Frequently Asked Questions
Q1: What's the difference between ERC-721 and ERC-1155?
ERC-721 defines unique, non-fungible tokens (one of a kind). ERC-1155 allows for semi-fungible tokens, meaning you can have multiple identical copies of a token. For most generative art collections, ERC-721 is the standard.
Q2: How do I handle gas fees for my users during minting?
You can opt for a "gasless" minting experience where your backend pays the gas indirectly (often by baking it into the price or using meta-transactions), or you can let users pay the gas directly on-chain. The latter is simpler but can be a barrier for users, especially on Ethereum.
Q3: What if I need to update my metadata after deployment?
The `tokenURI` function is typically immutable once deployed. For flexibility, you might implement a contract that allows updating an IPFS hash *pointer* rather than the data itself, or use a centralized API that serves data dynamically. However, true NFT immutability often means the metadata is fixed.
The Contract: Your First Deployment Challenge
You’ve successfully deployed a basic ERC721 contract on the Mumbai testnet. Now, the real test begins. Your challenge is to augment this contract with an allowlist mechanism. Implement a `MerkleProof` system that allows you to pre-approve specific addresses to mint during a private sale phase before a public sale opens. You’ll need to:
Generate a Merkle tree from a list of allowlist addresses.
Store the Merkle root in your contract.
Implement a new `allowlistMint` function that takes a token ID, recipient address, and the Merkle proof.
Ensure the function verifies the proof against the stored Merkle root and checks that the address is eligible.
This exercise will test your understanding of off-chain computation, secure access control, and Solidity programming. Deploy this enhanced contract to Mumbai and prove your mettle.
The digital frontier is unforgiving but rewarding. Master these technical challenges, and you'll not only create NFTs, you'll build the infrastructure for digital ownership.